Creating Notebook-Based Assignments
Lab.Computer lets instructors create assignments directly in Jupyter notebooks using the Assignment Extension. This extension loads automatically when you open a notebook and helps you design, manage, and grade assignments.
What You Can Include
- Locked content for instructions or examples
- Editable cells for student answers
- Auto‑graded tests
- Manual grading for open‑ended tasks
How to Create an Assignment
-
Launch a Notebook
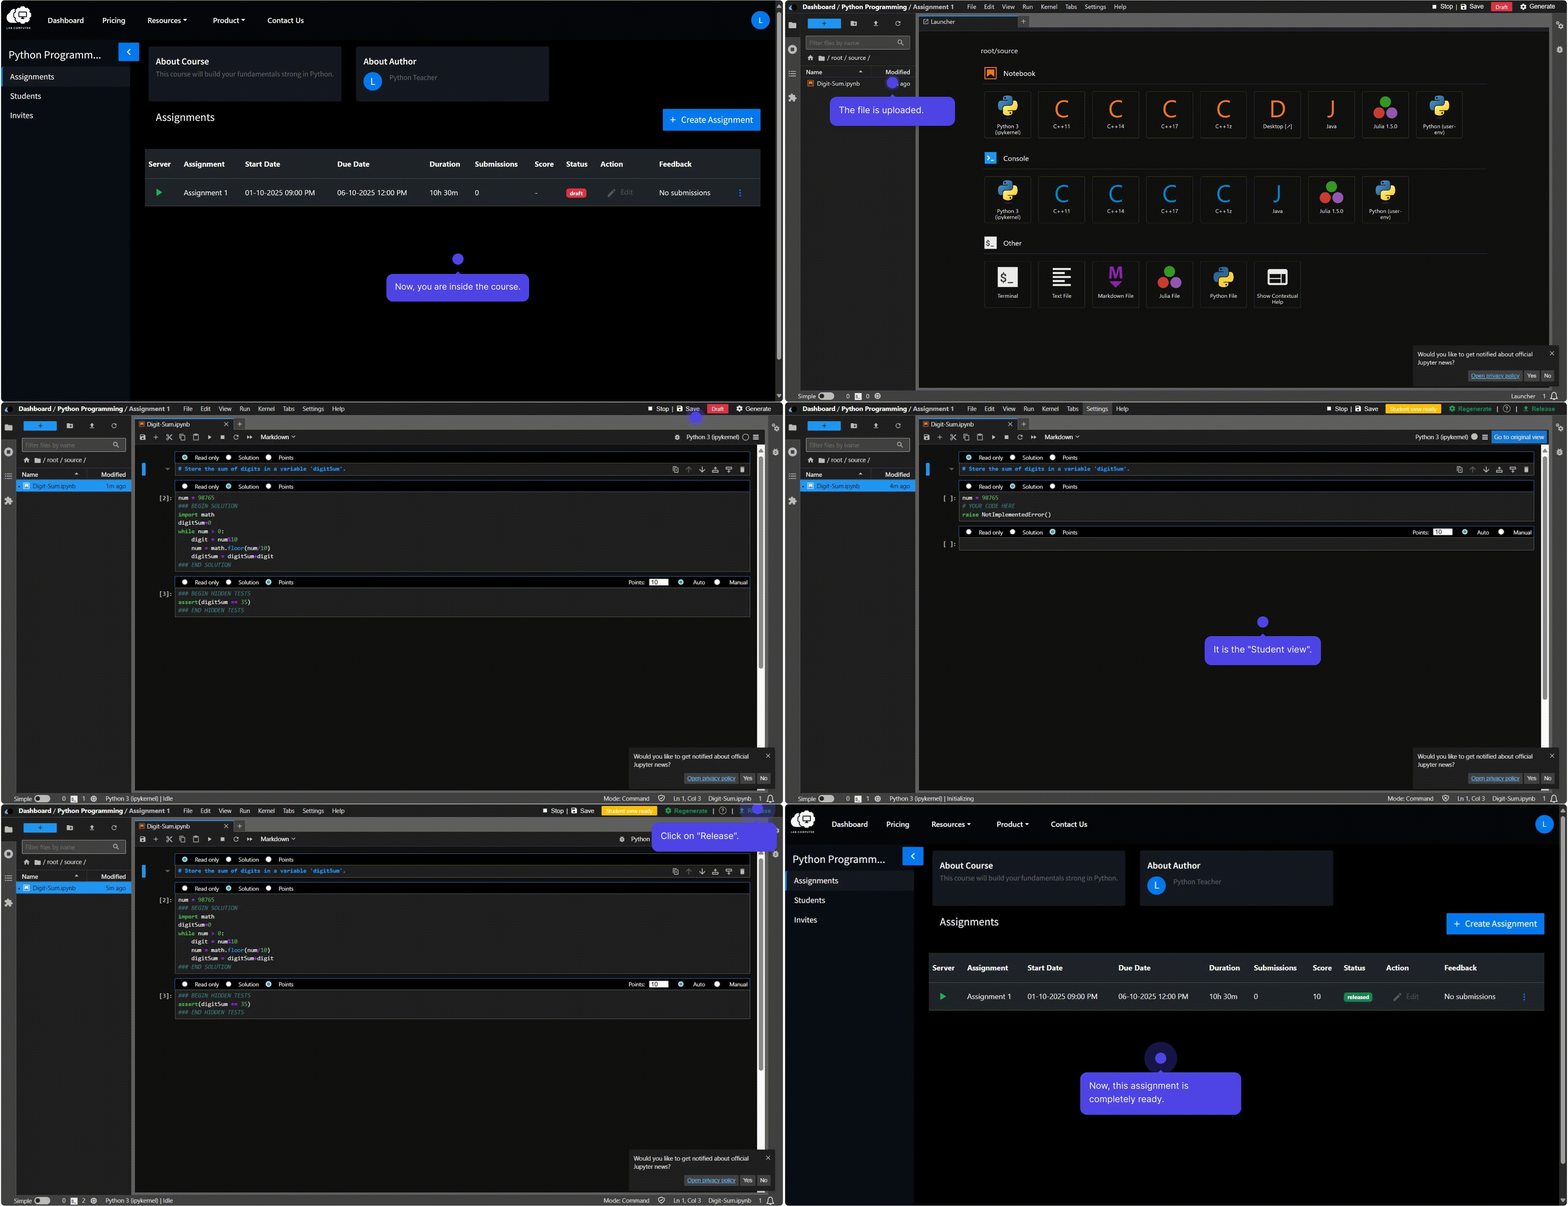
- Open or create a new Jupyter notebook.
- The Assignment Extension starts automatically.
-
Add and Configure Cells
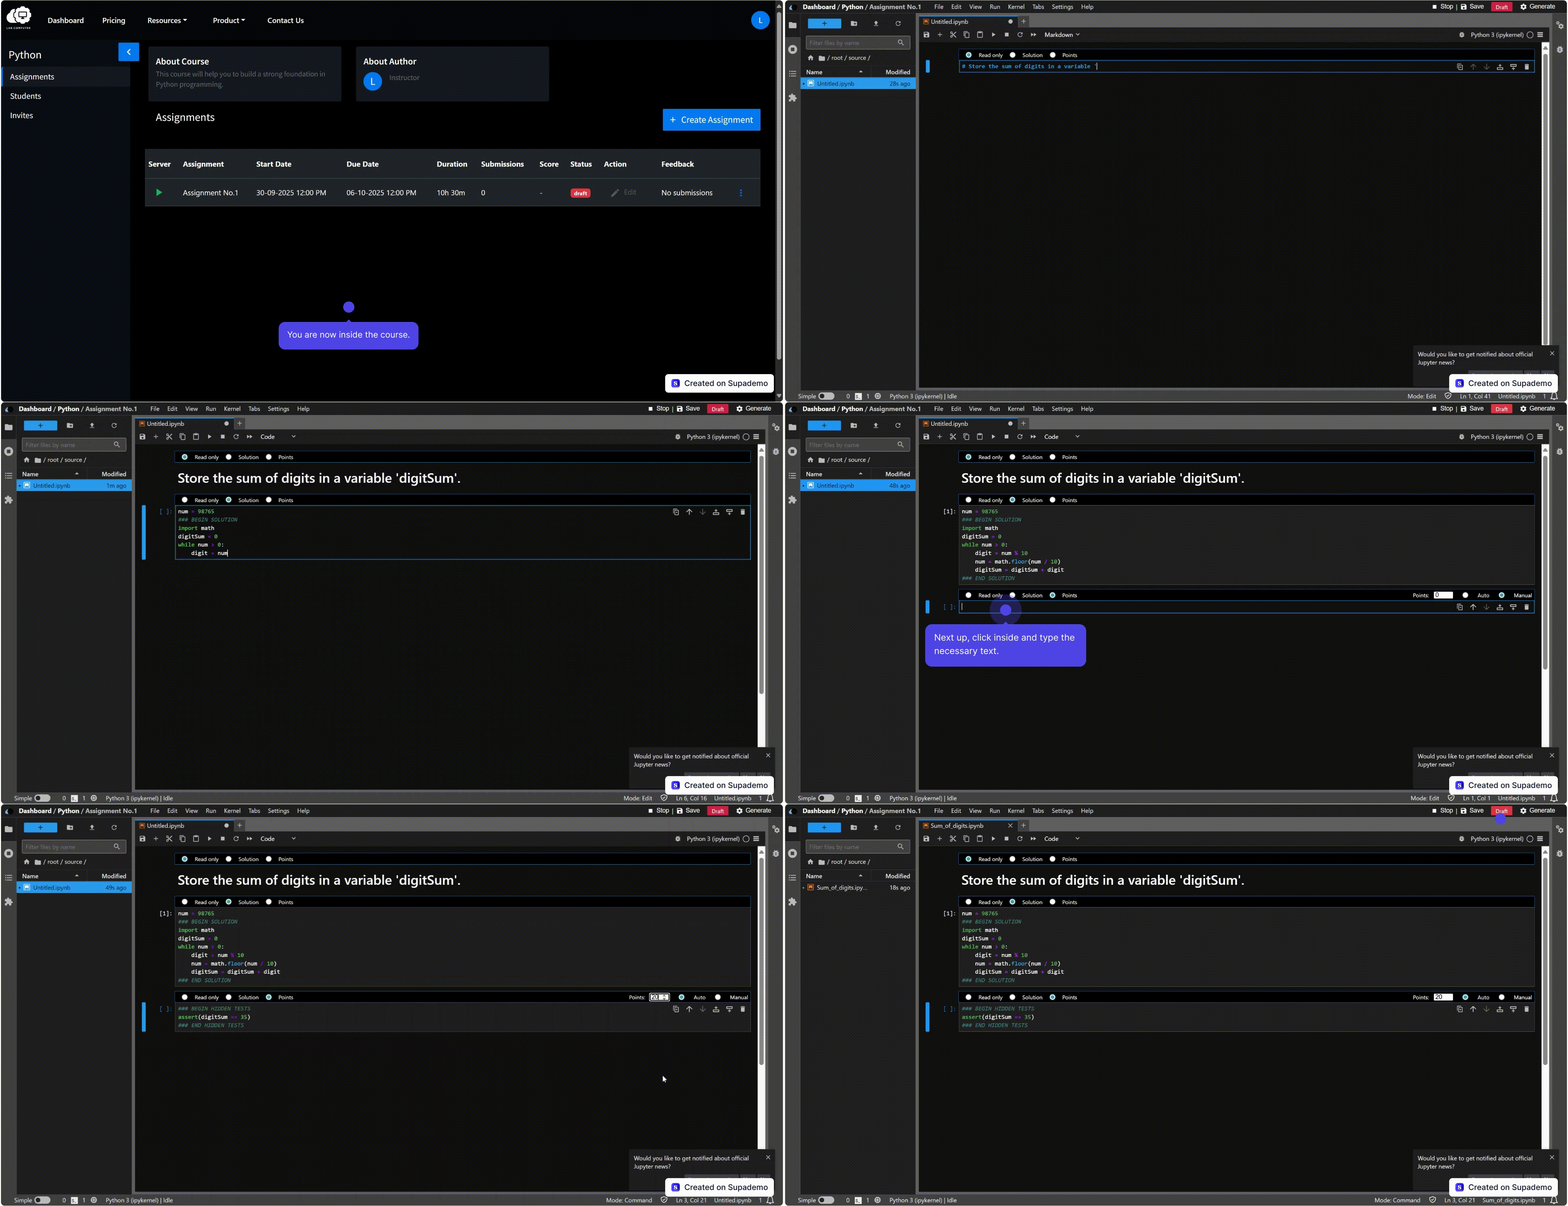
- Add cells for instructions, questions, and answers. Each cell type has a specific purpose.
- See the Assignment Cell Types section below.
-
Test and Validate
- Before releasing:
- Click Generate to test.
- Switch to Student View to check how it looks for students.
- Make sure:
- Editable areas work as expected.
- Locked cells stay protected.
- Tests and grading run correctly.
- Before releasing:
-
Release the Assignment
- When everything looks good:
- Click Release to publish your assignment.
- Verify it appears properly in the assignment list.
- When everything looks good:
For MCQs, see the MCQ Assignment Guide: Create MCQ
Saving and Stopping Your Project
Understanding the difference between saving your notebook file and saving your project environment helps ensure changes persist across restarts.
Notebook Save (Ctrl+S / File → Save)
- Saves the current
.ipynband any other files to the project filesystem. - Happens automatically at intervals and when you manually save.
- Does not capture system-level changes (e.g.,
apt-get, background services, kernel or environment changes).
Project Save
- Persists the project environment so changes survive a restart.
- Use after:
- Installing or removing system packages (e.g.,
apt-get,pip,conda). - Configuring services or environment settings you want to persist across restarts.
Stop Project
- Automatically performs a Project Save, then gracefully stops the notebook and any background processes.
- Use when you want changes (especially environment-level) to be applied on next start, or when you’re done working to free resources.
Recommended Workflow for Environment Changes
- Make environment changes (e.g., install packages, configure services).
- Save your notebooks and files (Notebook Save).
- Save Project to persist environment-level changes (optional—Stop also saves).
- Stop Project.
- Start the project again to verify your changes took effect.
Assignment Cell Types
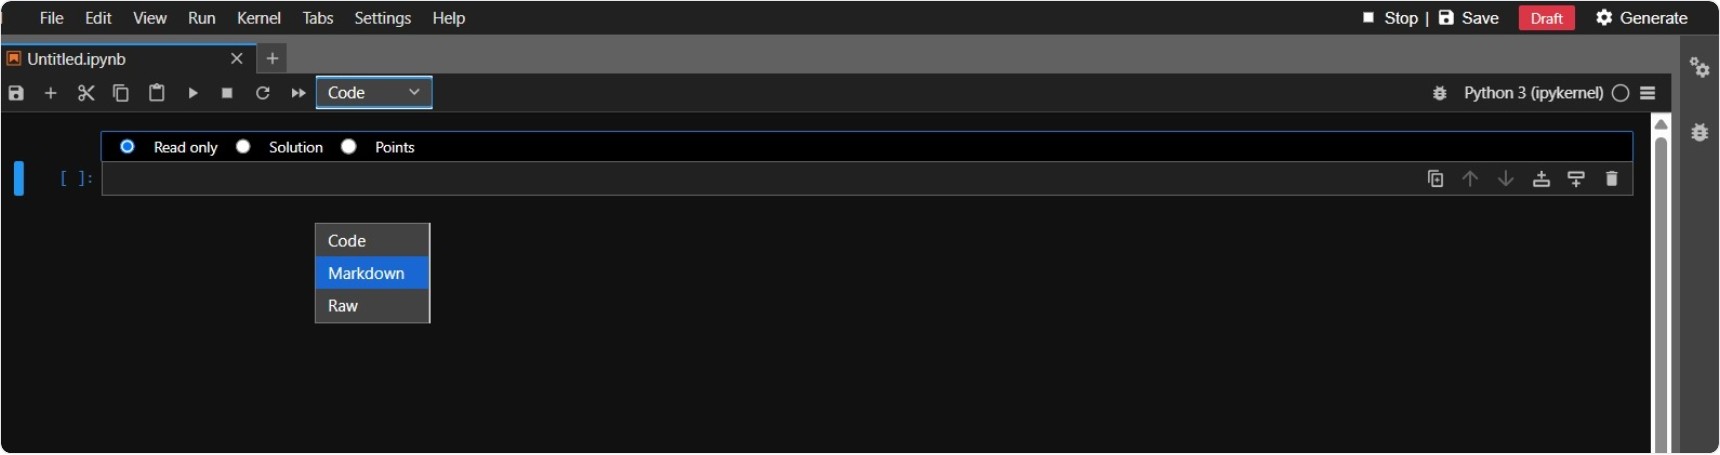
Each cell in a notebook can be configured through the Assignment Toolbar. Choose the type based on purpose. Notebooks support three types of base cells, each serving a specific purpose:
-
Code Cells
- Purpose: Run code using the notebook’s kernel.
- Use Cases: Writing and testing code, displaying outputs or results.
-
Markdown Cells
- Purpose: Add formatted text using Markdown.
- Use Cases: Writing instructions, explanations, or section headers.
-
Raw Cells
- Purpose: Add plain content that isn’t processed or rendered.
- Use Cases: Placeholder notes or reference text.
Cell Metadata
Each code and markdown cell can include metadata that defines its role in the assignment. There are three common roles:
-
Read‑only Cells
- Purpose: Show information that students cannot edit.
- Use Cases: Instructions, important notes, or helper functions.
-
Solution Cells
- Purpose: Where students write their answers or code.
- Use Cases: Coding tasks or written responses.
-
Point Cells
- Purpose: Assign points to a question or task for grading.
- Use Cases: Weighting questions and calculating total scores.

Grading Options
Once a cell is marked as a Point Cell, you can choose a grading option. The available options depend on the cell type:
For Code Cells
- Auto: Automatically graded using test cases.
- Manual: Reviewed and graded by an instructor.

For Markdown Cells
- MCQ: Used for creating multiple‑choice questions (auto‑graded).
- Manual: Reviewed and graded by an instructor.

Tips for Instructors
- Lock starter code and tests for consistency.
- Combine auto‑graded and manually graded tasks for balance.
- Use hidden tests for final evaluation.
- Provide clear instructions and point values.
- Always test the notebook before assigning it to students.