Course Guide
A course in Lab.Computer serves as the central container for managing all educational assets — including assignments, student enrollment, and performance tracking.
Creating a Course
When instructors log in, the Created Courses section opens by default on the Dashboard. From here, you can create and manage your courses.
Steps to Create a New Course:
- Authenticate into your Lab.Computer account.
- On the Dashboard, ensure you are in the Created Courses section (opened by default).
- Click the + Create Course button.
-
Enter course details:
- Course Name (required): The official title of the course.
- Author (optional): The instructor’s name or identifier.
- Course Description (optional): A short summary of the course objectives and content.
-
Click Create Course to finalize and add the course to your list.
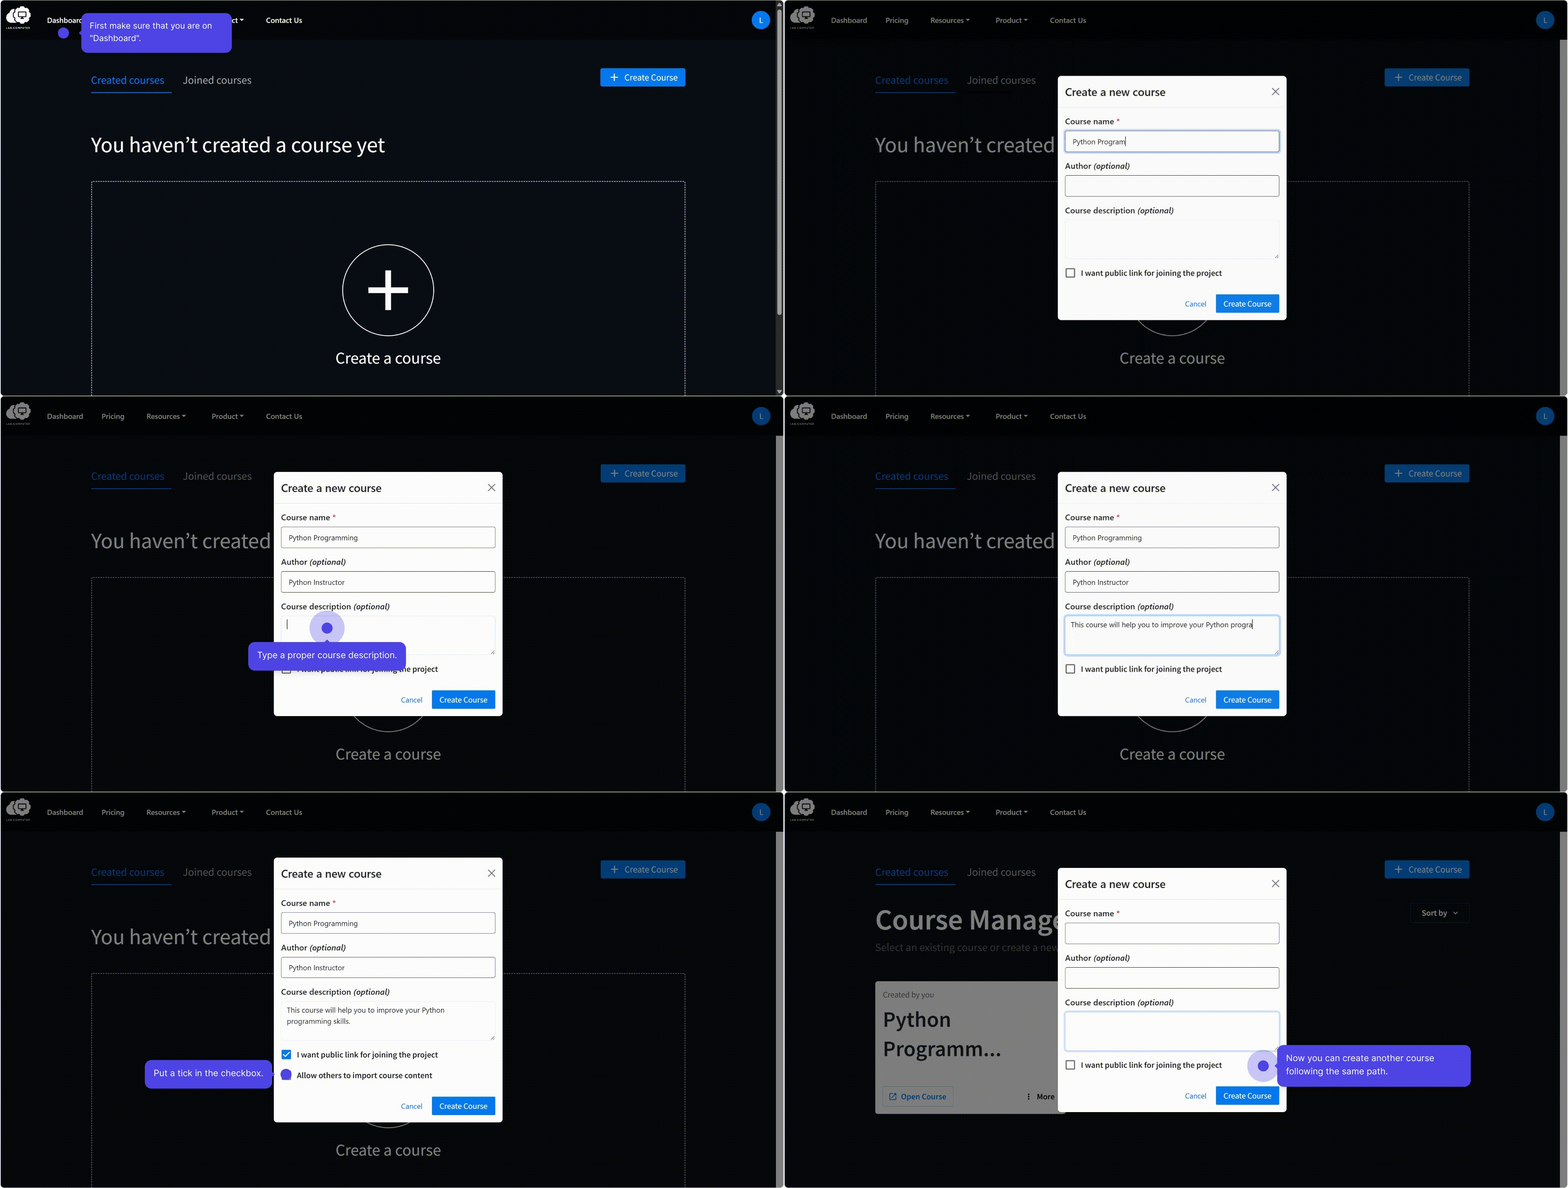
The new course will appear immediately in the Created Courses section, where you can configure settings and add assignments.
Opening a Course
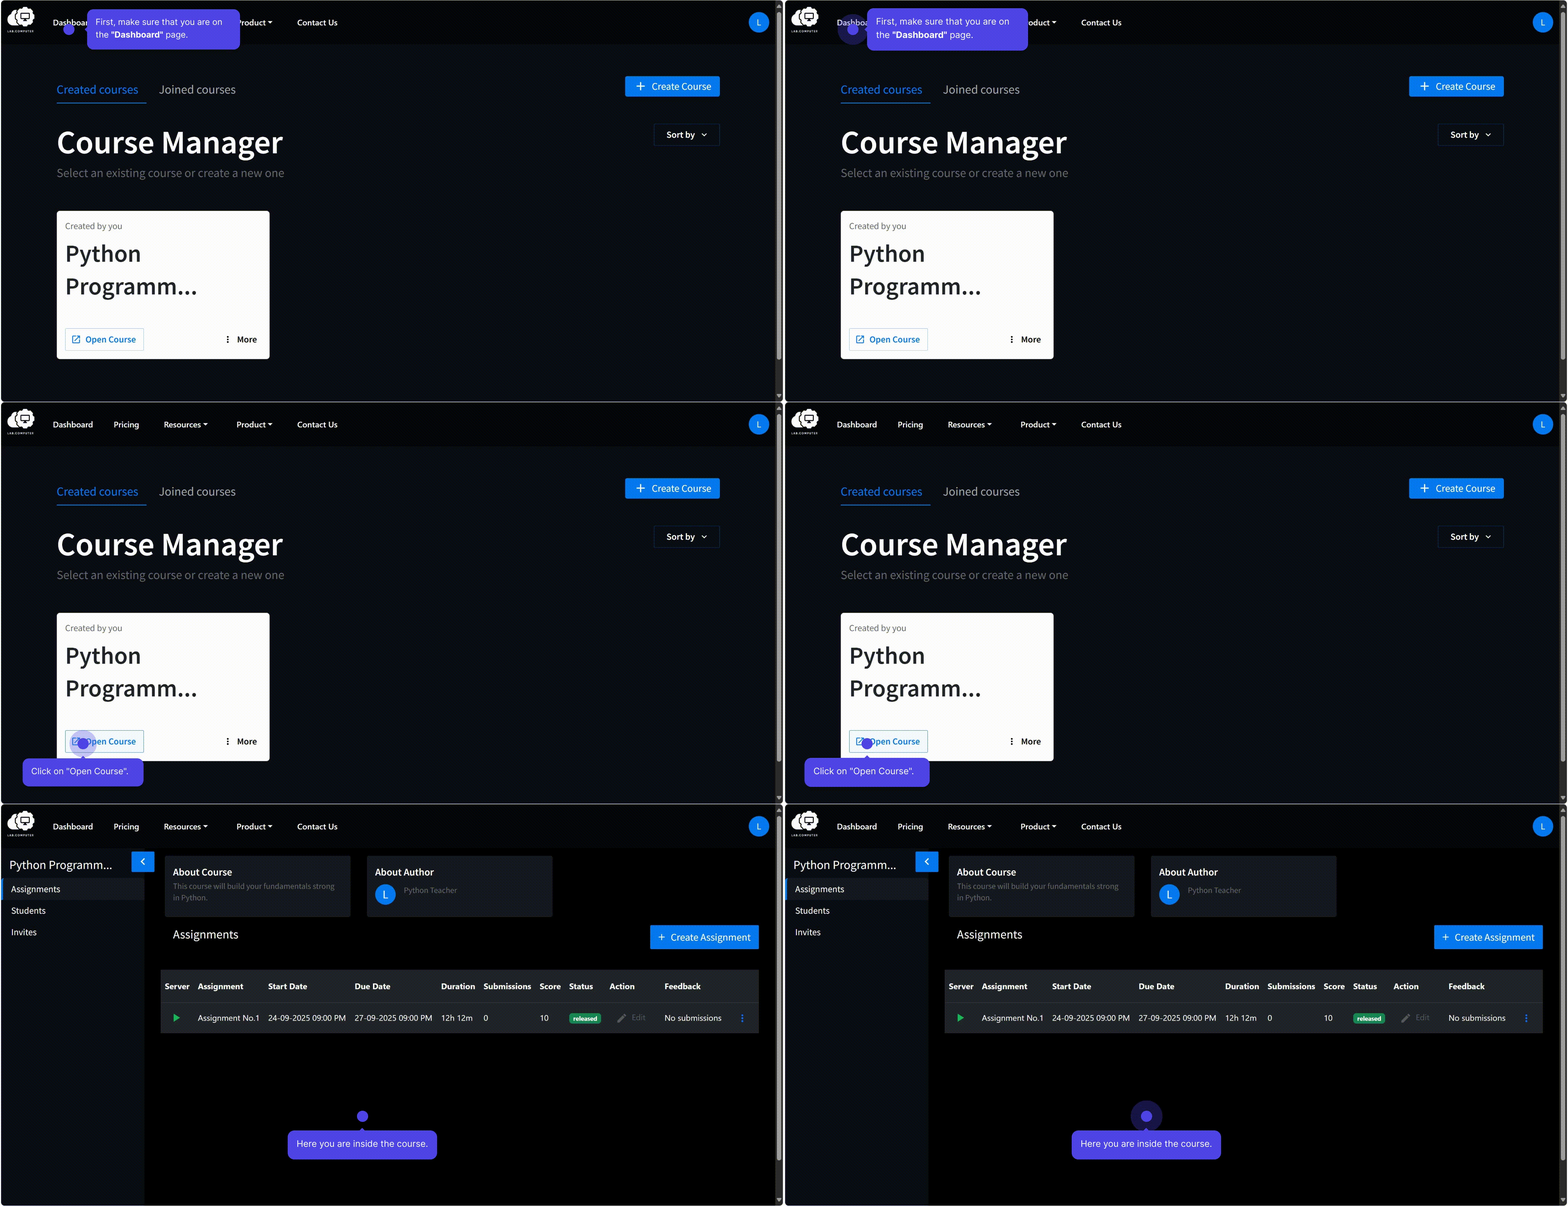
Once created, you can open your course anytime from the Created Courses list by clicking the Open Course of the desired course.
Managing Course Details
Course details define a course’s identity and control how it is accessed or reused on Lab.Computer. These settings can be configured during course creation or later by editing an existing course.
Course Configuration
Course Name (Required)
The course name is the main identifier visible to both instructors and students on their dashboards.
Author (Optional)
Indicates the instructor responsible for course facilitation. This helps students identify their instructor, especially in large institutions with multiple active courses.
Course Description (Optional)
A short summary (2–4 sentences) outlining course content, objectives, and learning outcomes.
Visible to both instructors and students throughout the course.
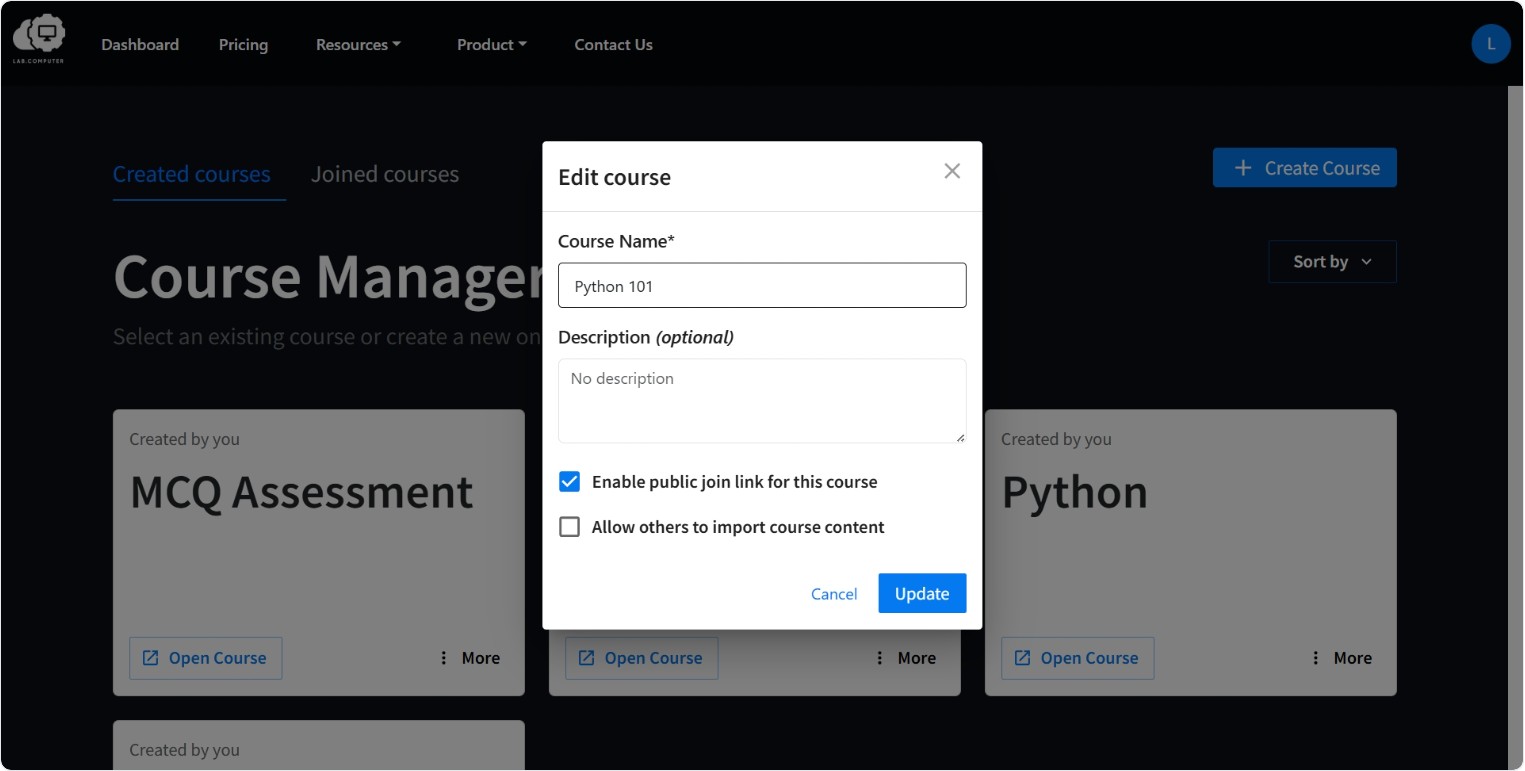
Enable Public Join Link for this Course (Optional)
Enabling this option generates a shareable URL that allows students to request access to the course directly.
Students joining through this link must be manually approved by the instructor before enrollment.
This option is especially useful for:
- Quickly onboarding large student groups
- Running open-access workshops or events
- Offering flexible self-enrollment options
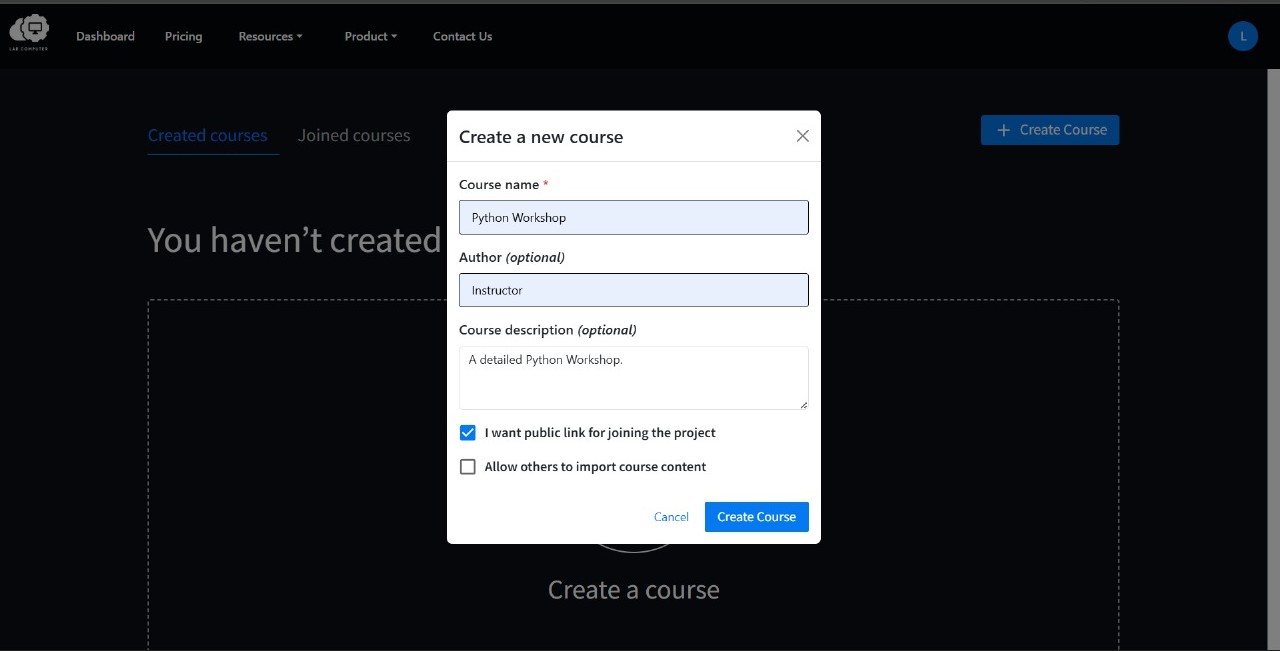
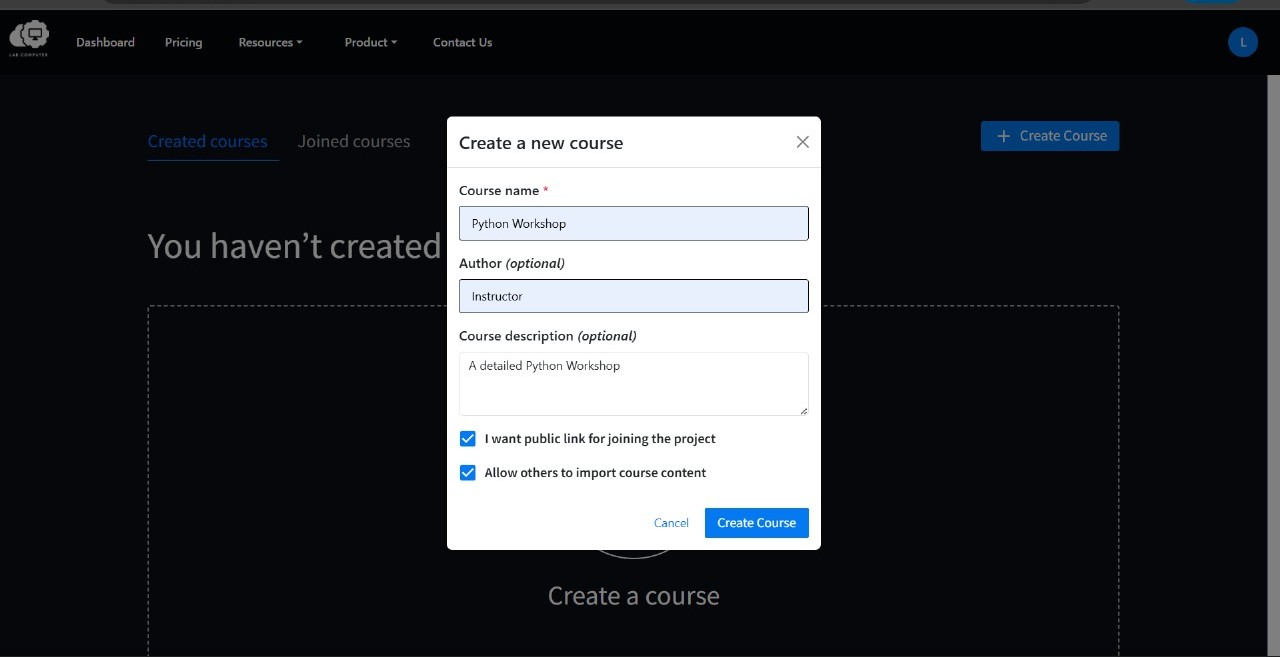
Allow Others to Import Course Content (Optional)
Enabling this option allows other instructors to import or clone your course (and its assignments) into their own Lab.Computer account.
This is helpful for:
- Collaborative course development
- Sharing reusable assignments
- Maintaining consistent content across sections
Note
- The Allow Others to Import Course Content setting is available only when the Public Join Link is enabled.
- If the Public Join Link is disabled, this option remains unavailable.
- If Allow Others to Import Course Content option is disabled, others may still join as participants but cannot copy or export your course content.
Editing Course Configuration
All course configuration options — including name, description, author, public link, and content import permissions — can be updated anytime after course creation.
To edit a course:
- Go to your Created Courses list on the Dashboard.
- Click Edit next to the course you want to update.
- Modify any of the available configuration options as needed.
- Click Update to apply the changes.
Additional Notes
- All newly created courses appear under Created Courses on your dashboard.
- You can later modify course details or delete a course if it is no longer needed.
- For adding assignments, see the Assignments Guide.