Creating a New Kernel (R Example)
R is not installed by default in Lab.Computer. To run R assignments, install the R runtime and register a new R kernel for Jupyter.
Step 1: Install R on Ubuntu
Add the official CRAN repository (the default Ubuntu R version may be outdated):
sudo mkdir -p /etc/apt/keyrings
curl -fsSL https://cloud.r-project.org/bin/linux/ubuntu/marutter_pubkey.asc | sudo gpg --dearmor -o /etc/apt/keyrings/cran.gpg

echo "deb [signed-by=/etc/apt/keyrings/cran.gpg] https://cloud.r-project.org/bin/linux/ubuntu noble-cran40/" | sudo tee /etc/apt/sources.list.d/cran.list
Note: Replace noble-cran40 with your Ubuntu version if you’re on an older release (e.g., jammy-cran40 for Ubuntu 22.04 or focal-cran40 for 20.04).
Update Ubuntu and install R:
sudo apt-get update
sudo apt-get install -y r-base r-base-dev
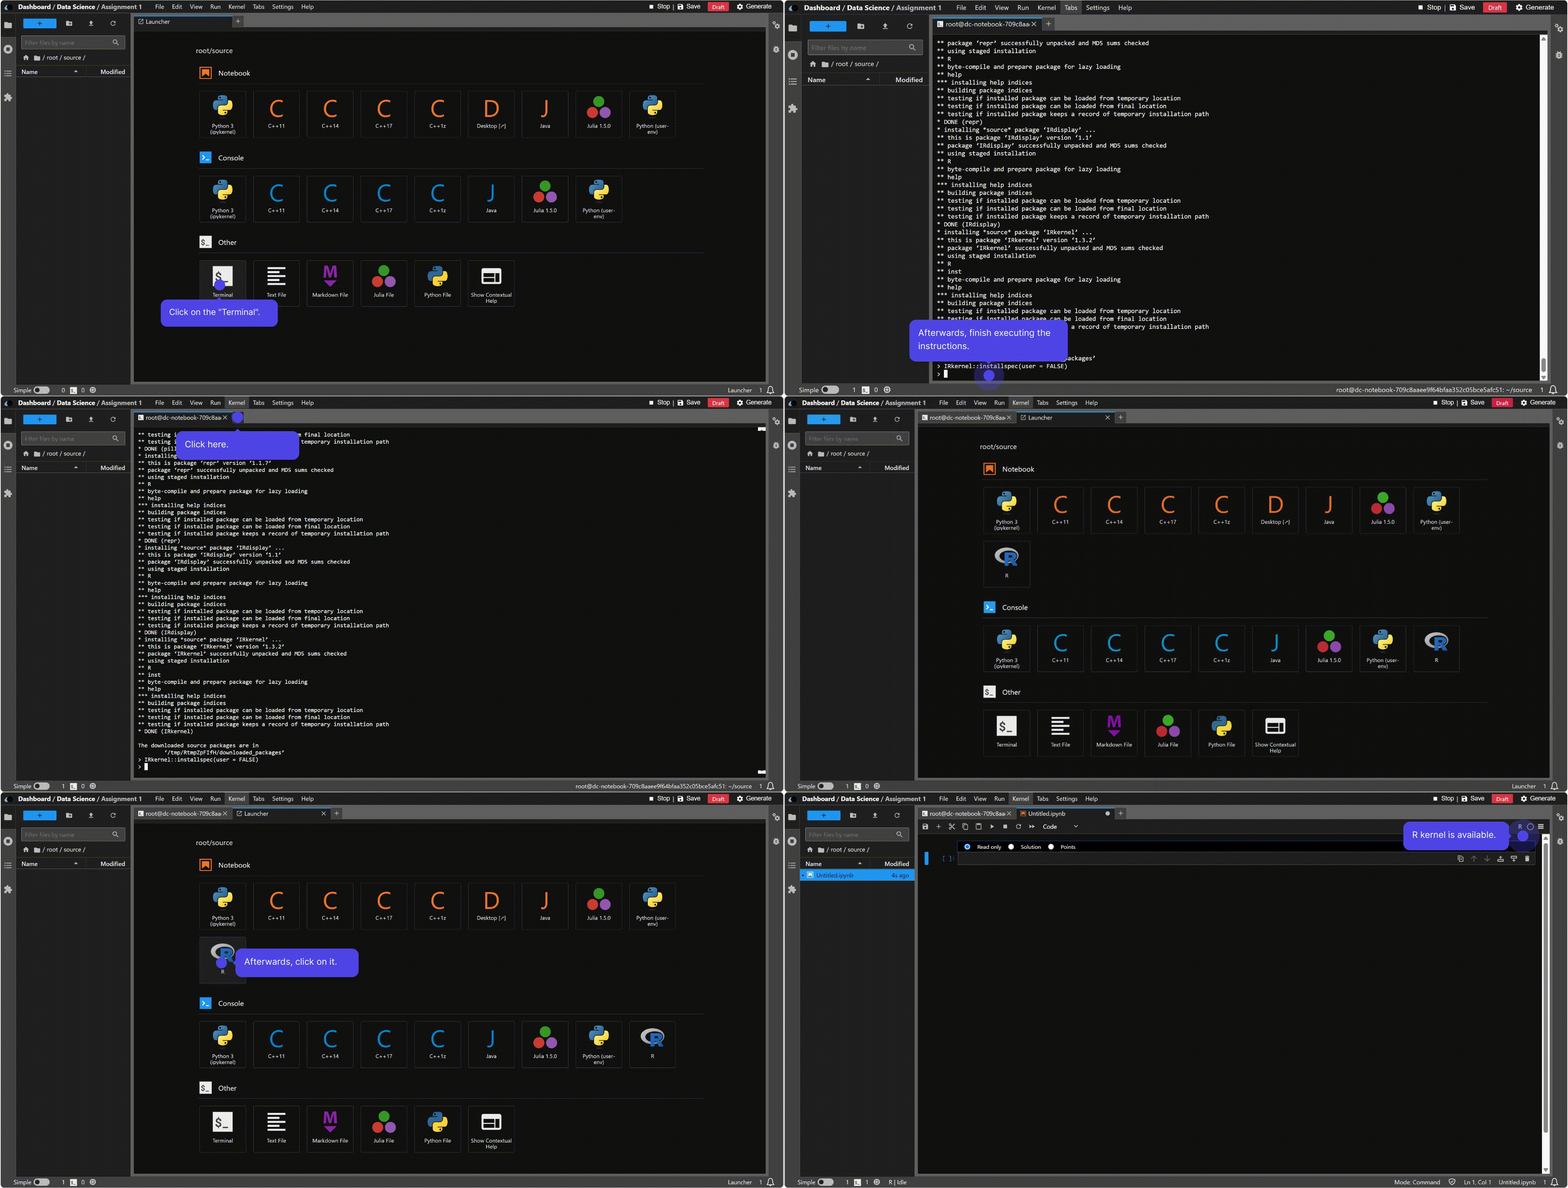
Step 2: Install the R Kernel for Jupyter
Start R in the terminal:
R
Then run the following commands in the R prompt:
install.packages('IRkernel')
IRkernel::installspec(user = FALSE)
After this, the R kernel will be available in Jupyter. You may need to restart Jupyter for the kernel to appear.
Step 3: Select Your Kernel
- Open the notebook where you want to use R.
- Navigate to Kernel → Change Kernel and select R.
Step 4: Start an R Assignment
- Download a sample R assignment file (e.g.,
r-sum.ipynb). - Upload it using the Upload button in Jupyter.
- Open the notebook and click Generate in the assignment toolbar to verify that it works.
Tips for R Autograded Tests
- To signal a failed test in a student’s code, use the
stop()instruction. - If
stop()is triggered, the student receives 0 points for that question, but downstream cells will continue executing.
This setup enables you to create and manage R assignments efficiently in Lab.Computer, combining a fully functional R environment with the assignment management tools.