Student Enrollment
Student enrollment is the process of granting learners access to a course on Lab.Computer.
It allows instructors to manage course membership, control access to assignments and materials, and maintain accurate student records.
Lab.Computer supports multiple enrollment methods suitable for both small and large courses.
Instructors can enroll or invite students using one of the following four methods:
- Public Link — Share a link that allows students to request access.
- Share ID — Provide a secure alphanumeric code for students to join.
- Individual Invites — Send personalized invitations via email.
- Bulk Enrollment (CSV) — Upload multiple student emails for mass invitations.
Enrolling via Public Link
This method allows instructors to invite individual or multiple students through a single shareable link.
Steps:
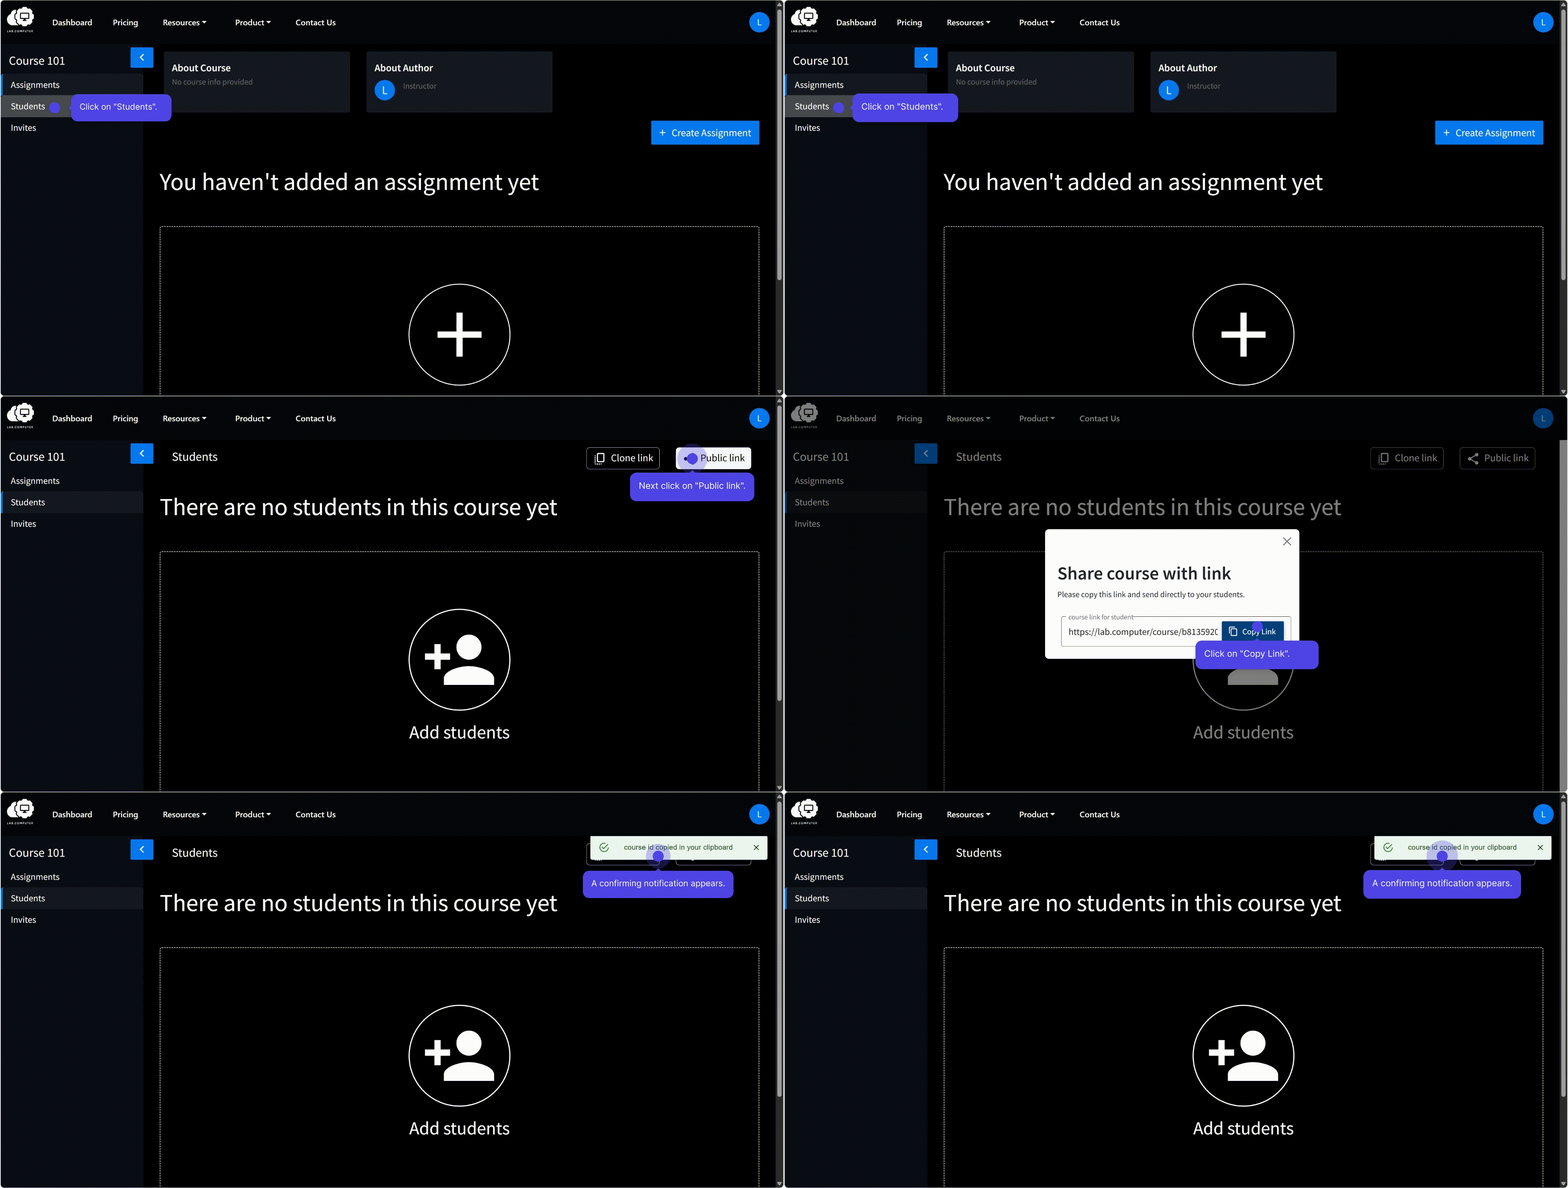
- Open the course from your Dashboard.
- Navigate to the Students tab.
- Click Public Link.
- Copy the generated link and share it with students.
- A confirmation message appears after copying.
Instructor Action Required
- Students joining via the public link must submit a join request.
- The instructor must manually approve each request before enrollment is finalized.
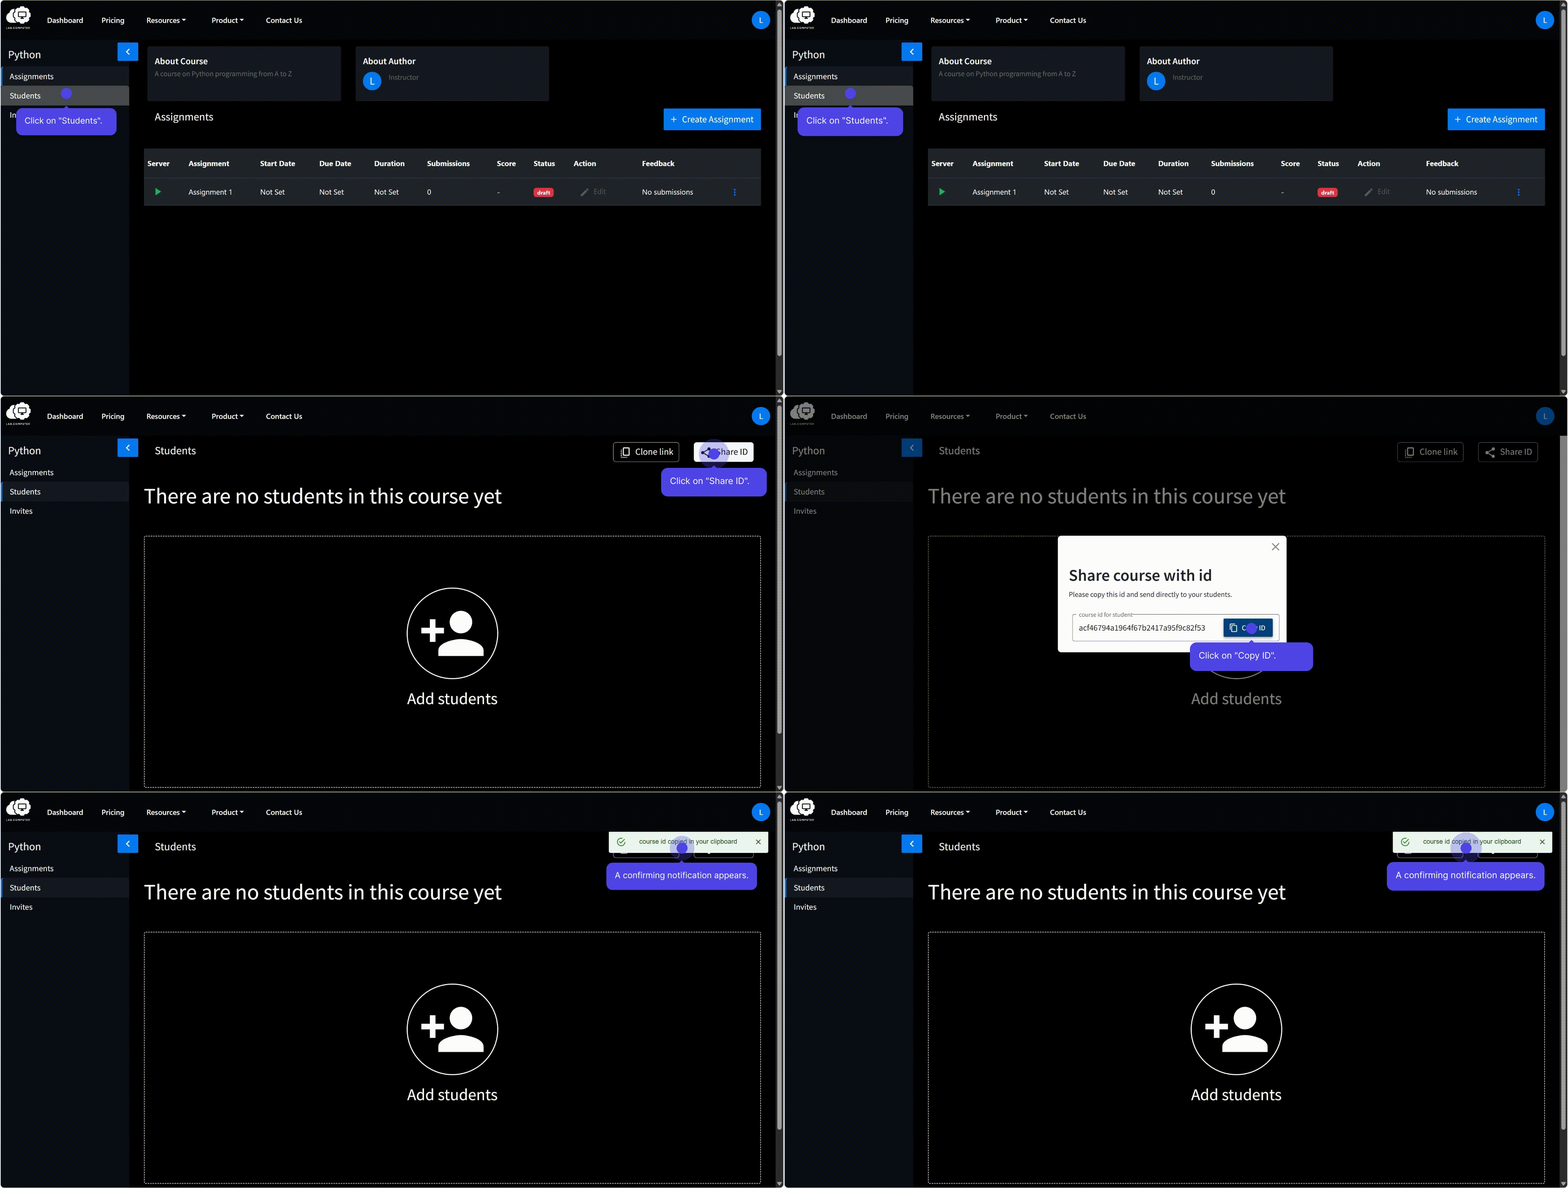
Enrolling via Share ID
Each course has a unique Share ID that can be distributed to students for secure joining.
Steps:
- Open the course from your Dashboard.
- Go to the Students tab.
- Click Share ID to generate the code.
- Copy and share the code with students.
- A confirmation message appears once copied.
Instructor Action Required
- Students joining via the share ID must submit a join request.
- Students joining with the Share ID must be approved manually before accessing course materials.
Inviting Students Individually
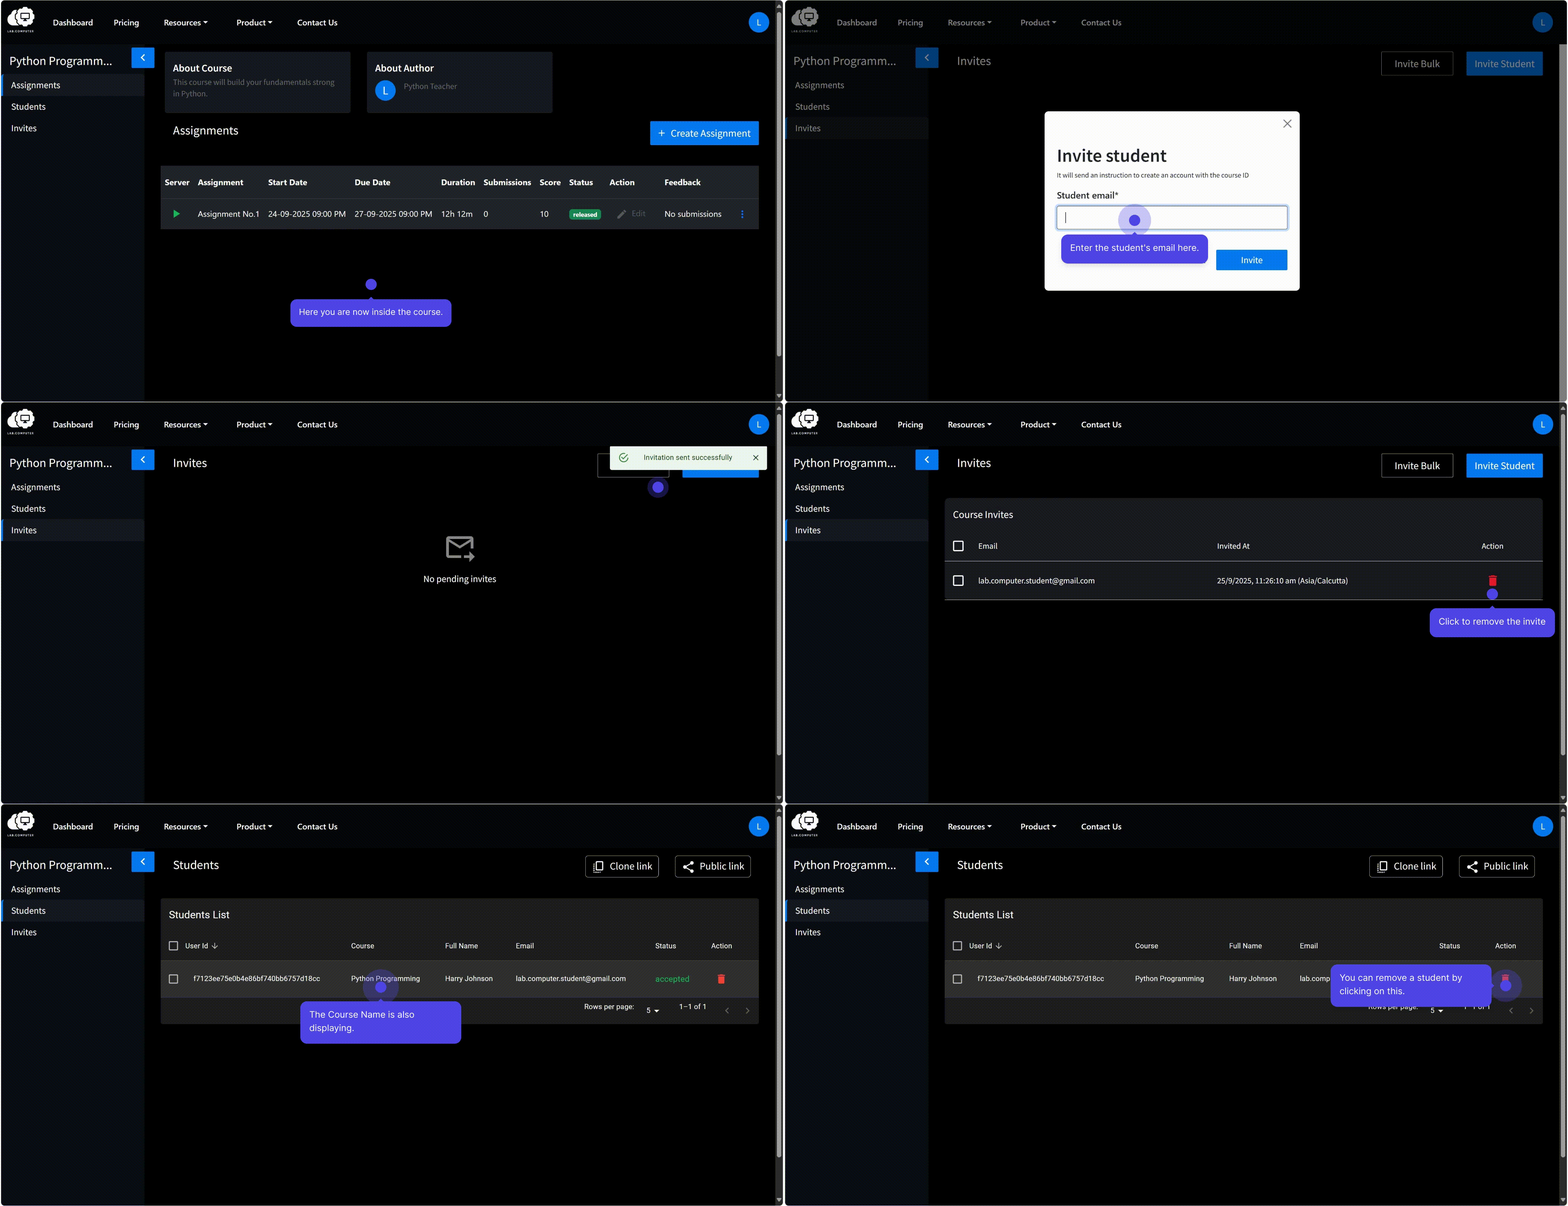
For smaller or more personalized classes, instructors can add students one at a time using their email addresses.
Steps:
- Open the course from your Dashboard.
- Navigate to the Invites tab.
- Click Invite Student.
- Enter the student’s email address.
- Click Invite to send the enrollment email.
Each sent invitation appears under the Invites tab with details such as:
- Email — Recipient address
- Invited At — Time of invitation
- Action — Option to cancel or remove
Note
Students receive an email containing the course details and the enrollment link.
Best for:
- Small or mid-sized classes
- Gradual onboarding
- Personalized learning experiences
Bulk Enrollment via CSV
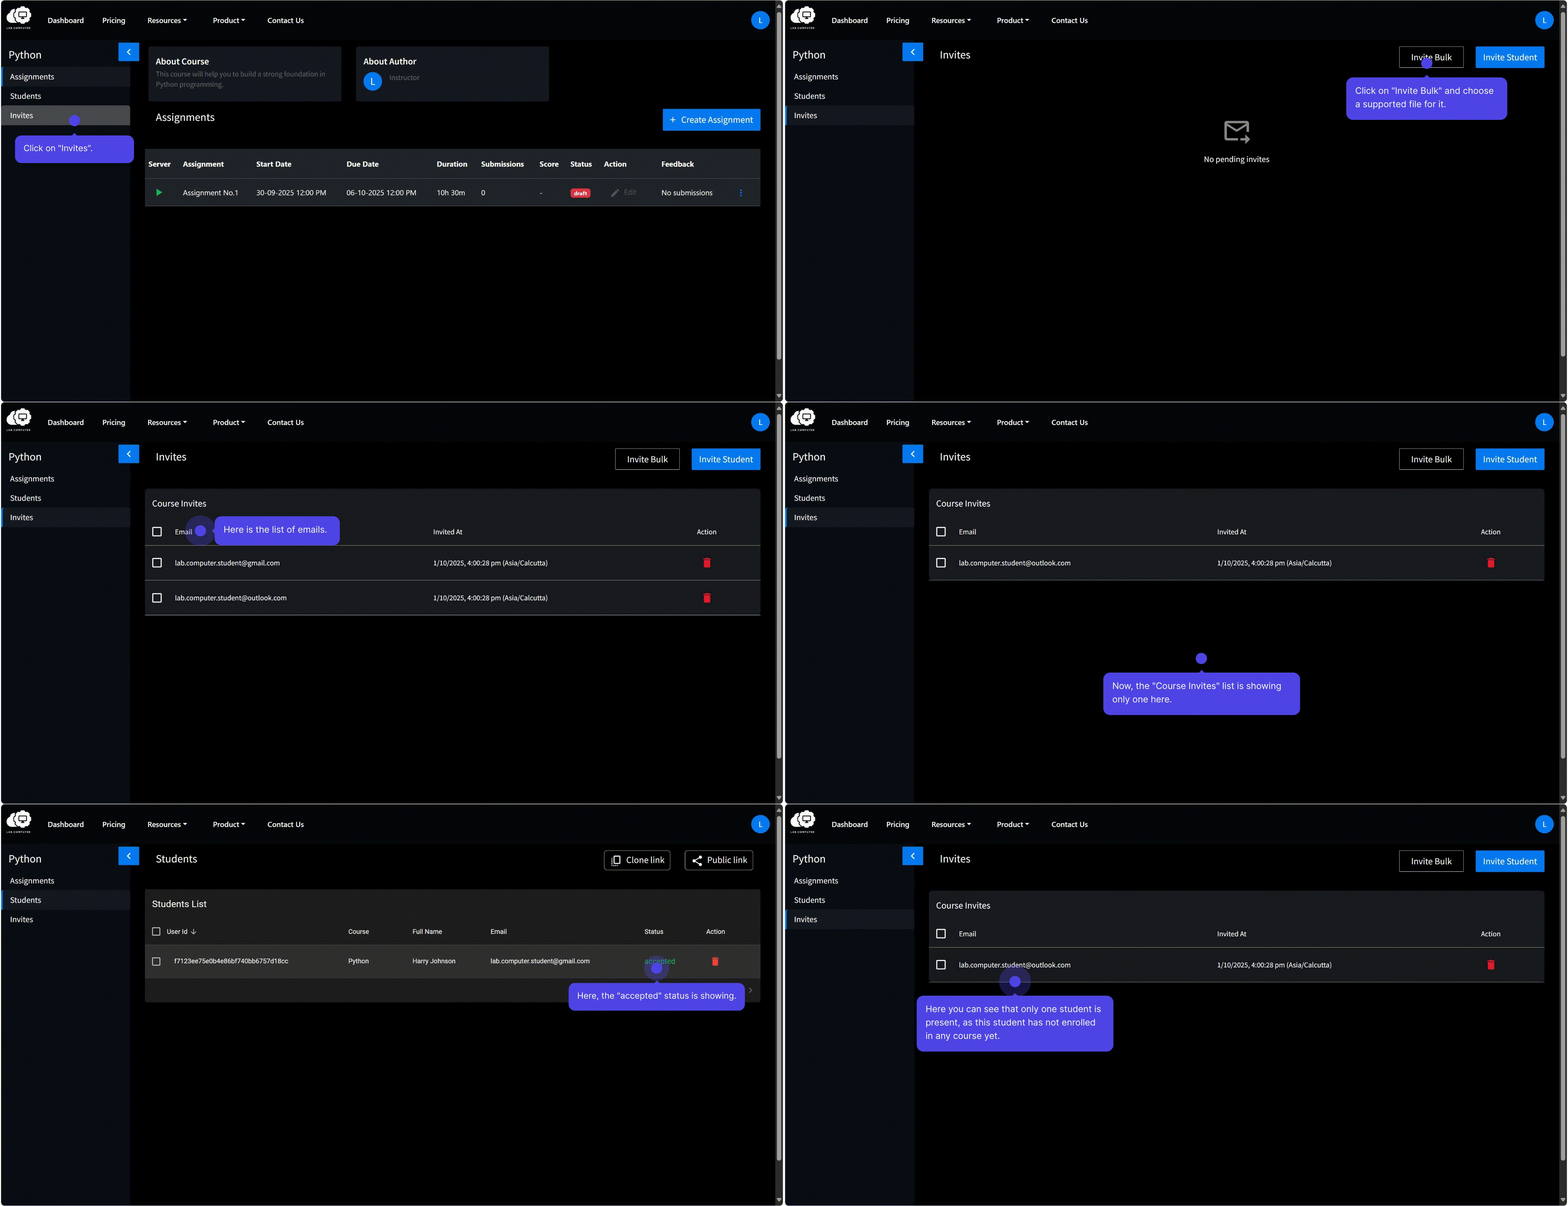
For large courses, instructors can invite many students simultaneously by uploading a CSV file.
Steps:
- Open the course from your Dashboard.
- Navigate to the Invites tab.
- Click Bulk Invite.
- Upload a CSV file containing a single column: Email Address.
- Click Upload to send invitations automatically.
A confirmation appears after upload, and all invited students are listed under the Invites tab.
Best for:
- Large lecture courses
- Multi-section classes
- Institutional enrollments
Managing Enrollment Requests
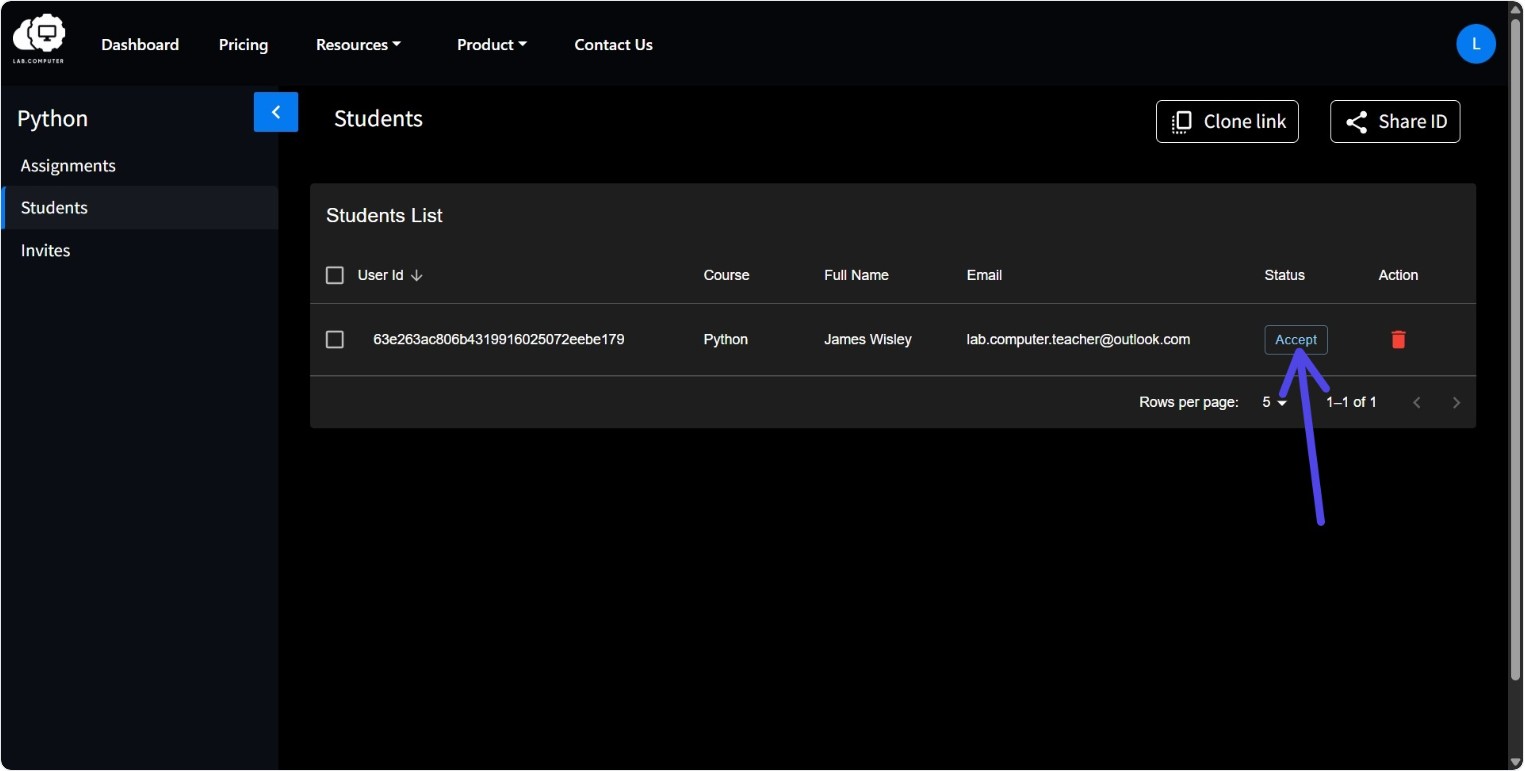
Students joining via Public Link or Share ID require manual approval by the instructor.
Steps to manage enrollment requests:
- Open the Course Dashboard.
- Go to Pending Requests or Enrollment Requests.
- Review student details such as:
- Name
- Email address
- Course name
- Status
- Accept or Reject Requests
- To approve a student: Click Accept.
- To reject a request: Click Action → Reject.
Note
Once approved, students gain immediate access to all released course materials and assignments.
Managing Enrolled Students
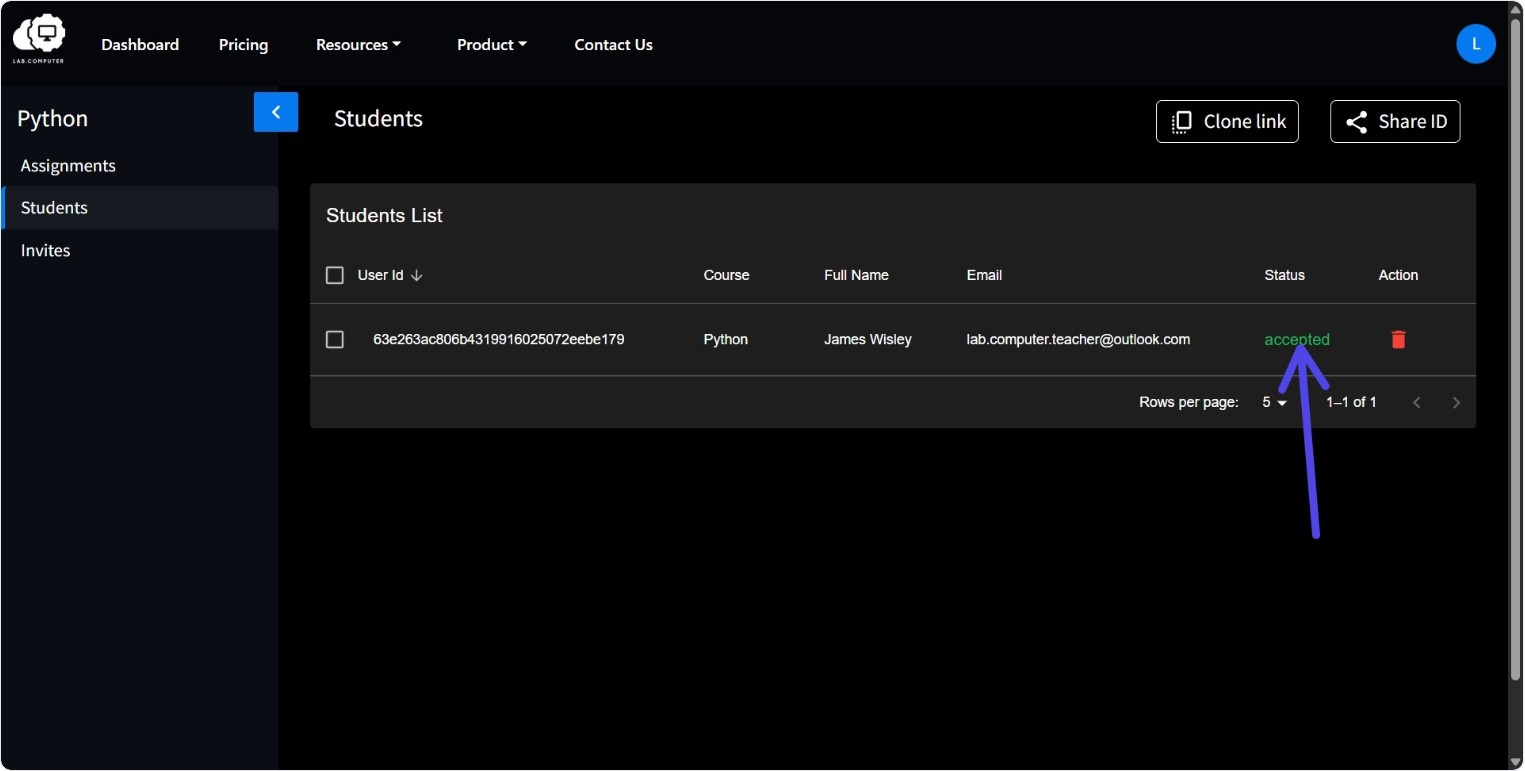
Instructors can view and manage enrolled students directly from the Students tab.
Viewing Student List
The Students tab displays detailed enrollment data including:
- Complete list of enrolled students
- User ID
- Full Name
- Email Address
- Enrollment Date and Status
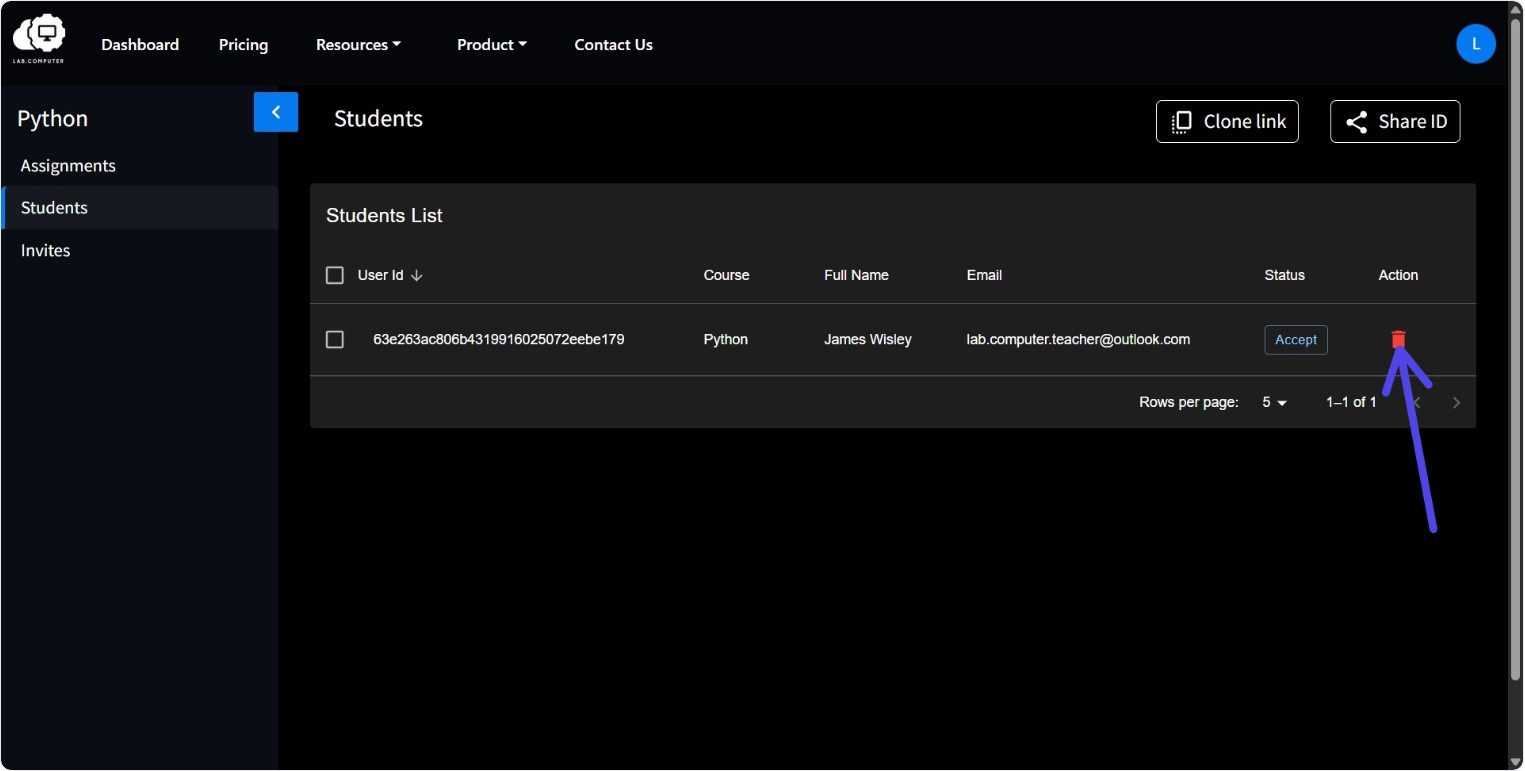
Removing Students
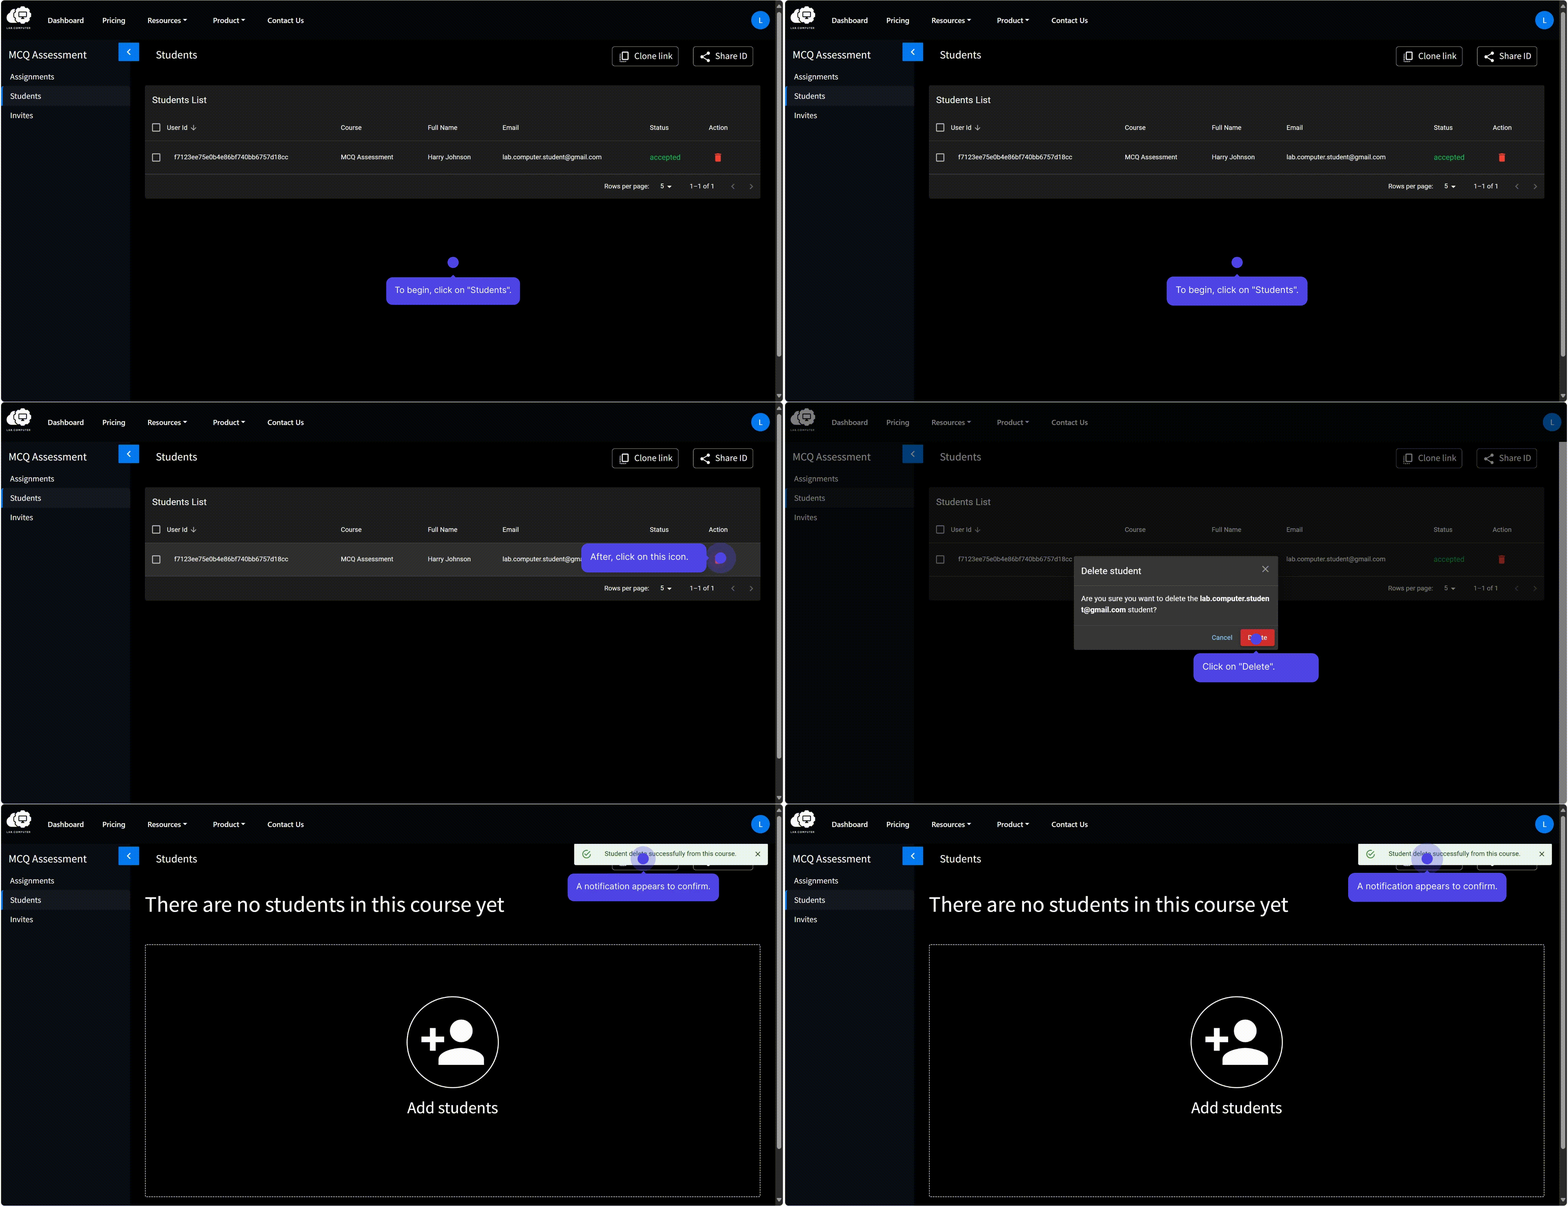
Instructors can remove a student at any time:
- Locate the student in the Student List.
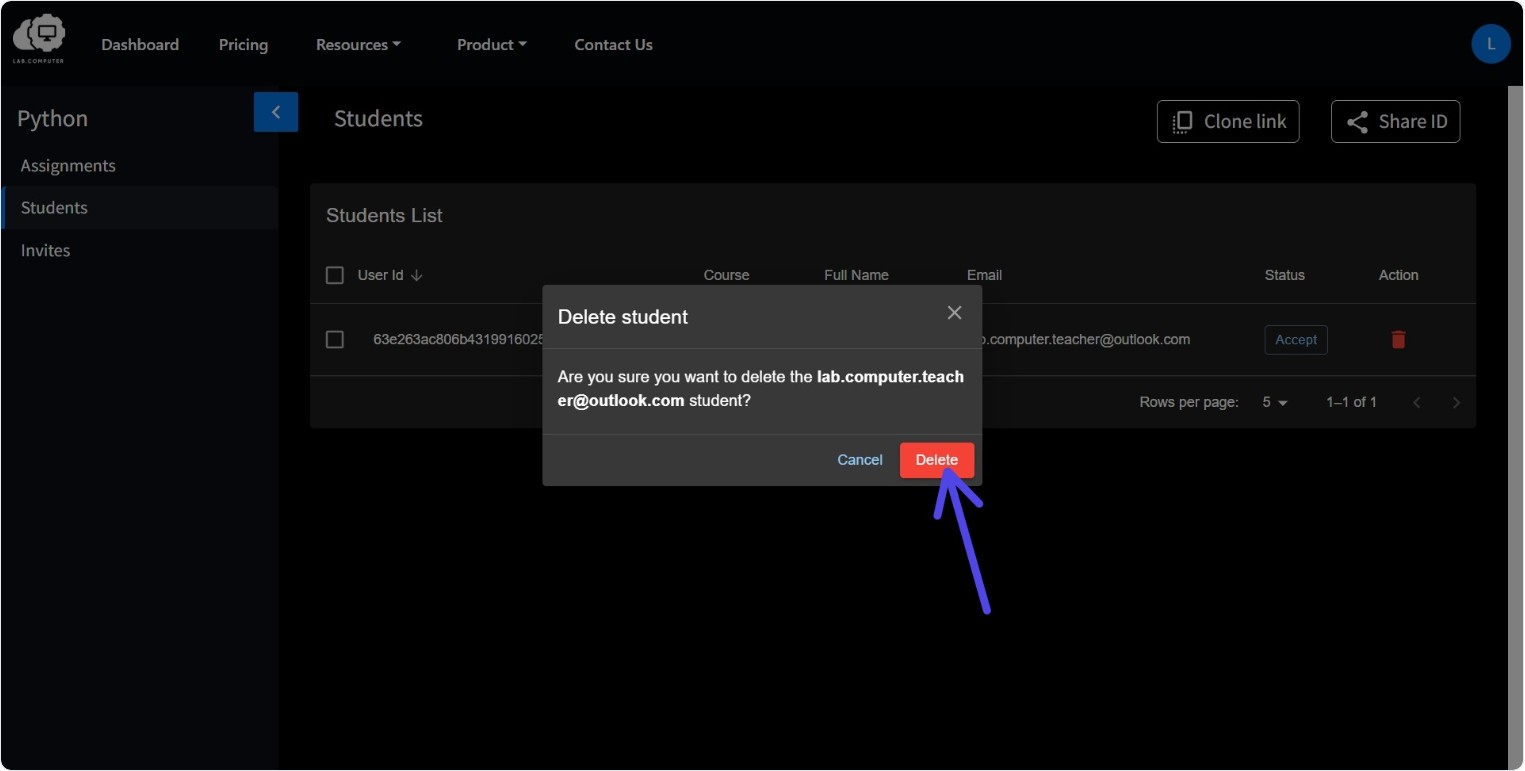
- Click the Delete icon under the Action column.
- Confirm removal by clicking Delete in the confirmation popup.
Note
Removed students lose access to the course immediately.