Create an Assignment in Lab.Computer
Lab.Computer lets instructors create auto‑graded or manually graded assignments directly within interactive notebooks. You can either start from a new notebook or upload an existing one. The Grading/Assignment toolbar loads automatically when the notebook opens, allowing you to define questions, add tests, and configure points.
Step 1: Initialize the Assignment
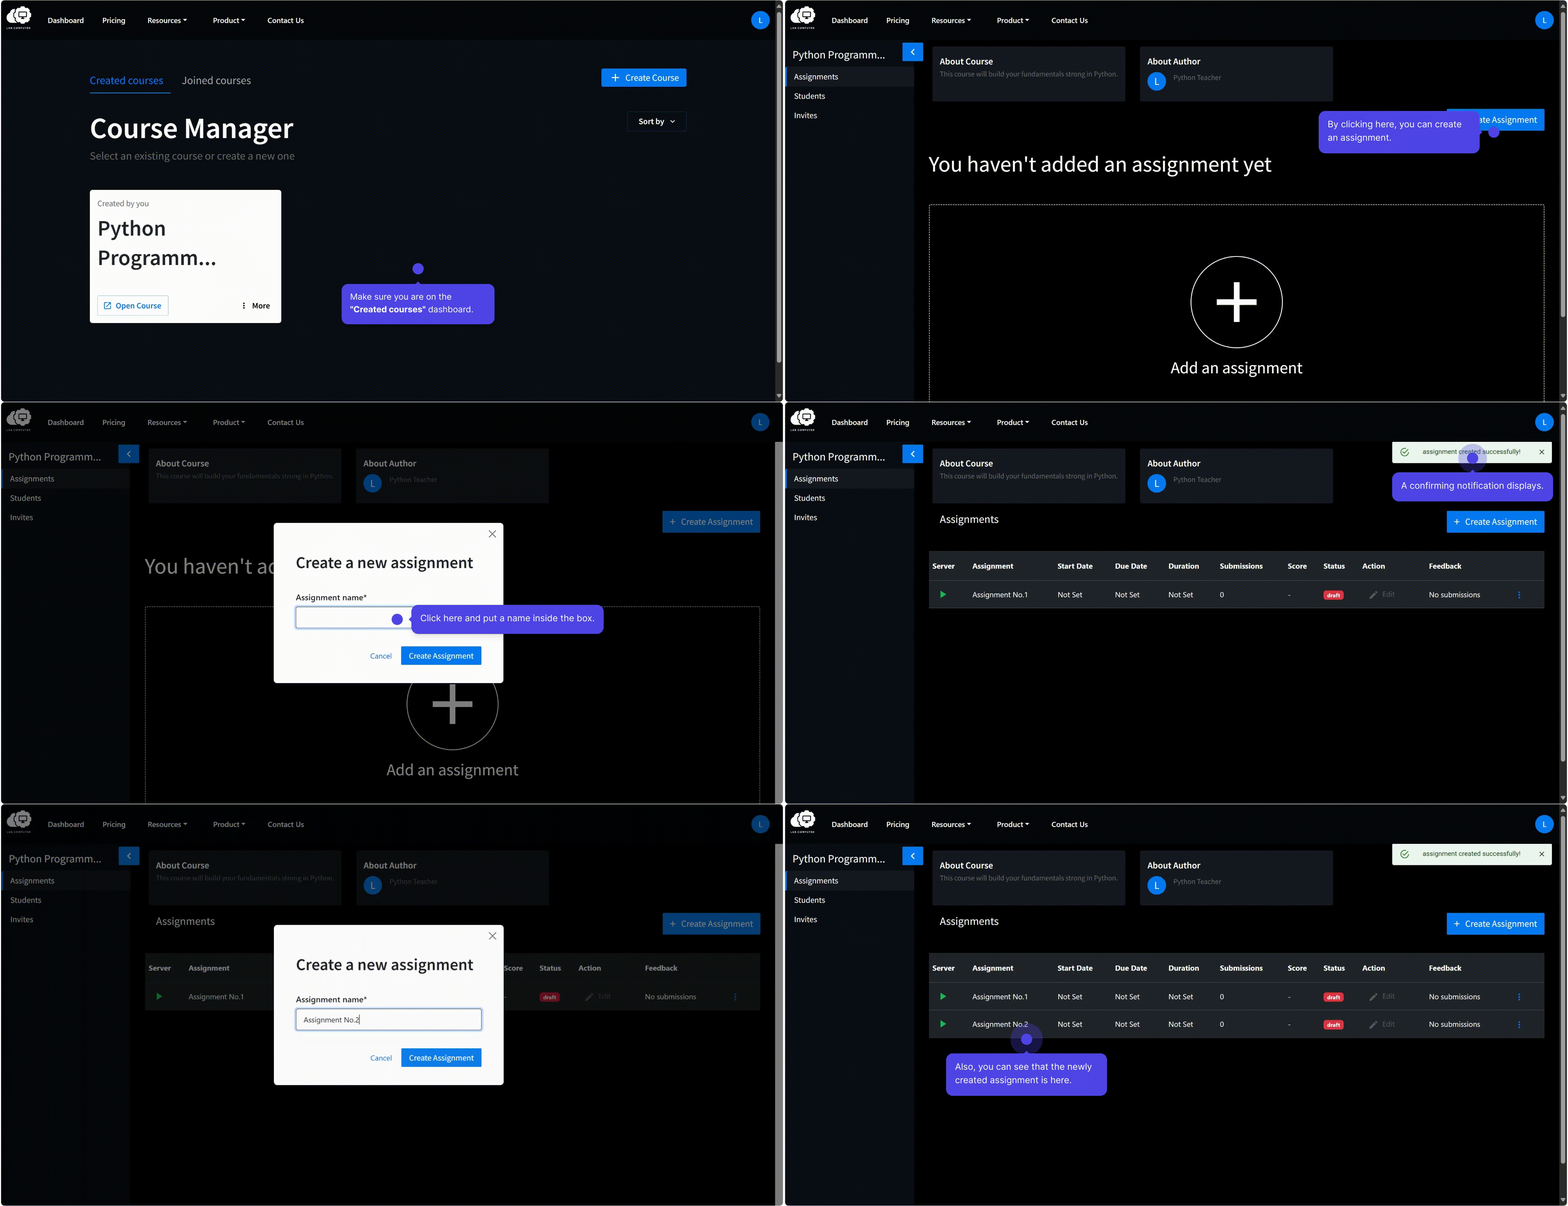
- Open your Course Dashboard and select the course.
- Click "Create Assignment" (or the + icon) and enter a descriptive name.
- Click "Create Assignment" to confirm.
- The assignment appears in the list with Draft status (not visible to students).
Step 2: Launch the Assignment Editor
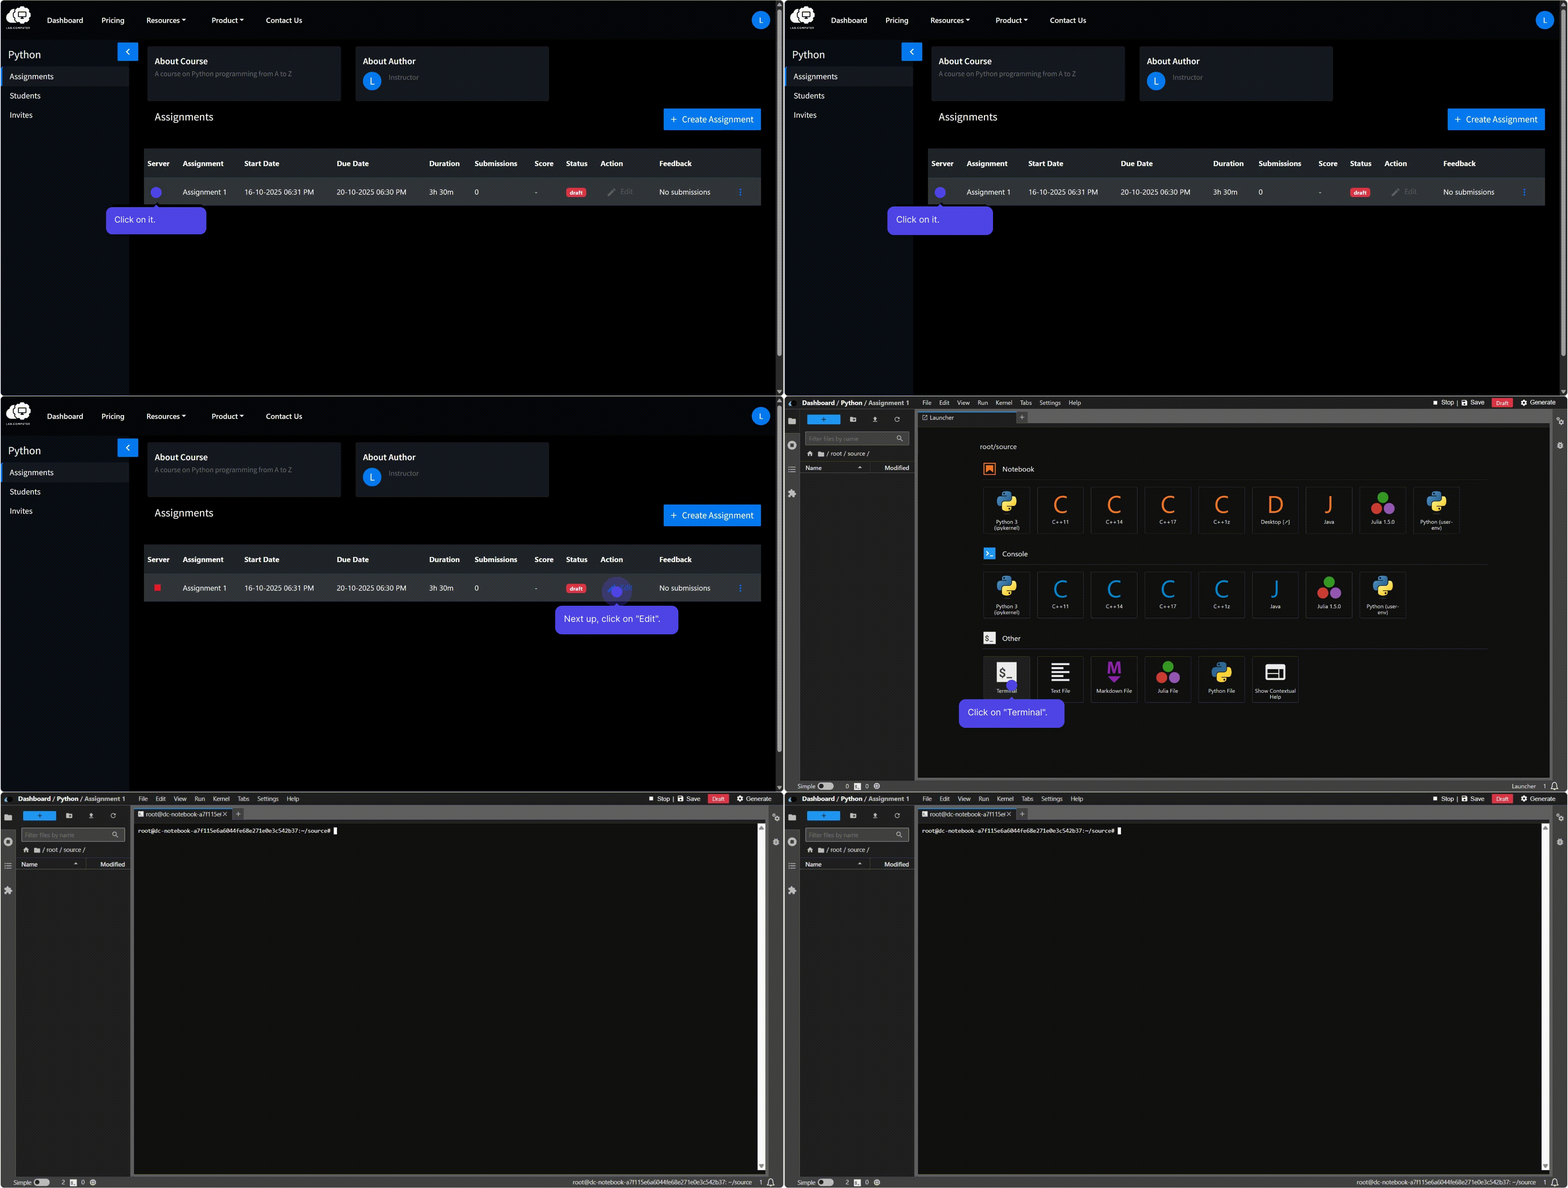
- In the assignment card, click Play Icon to start the environment (15–40 seconds).
- Click "Edit" to open the notebook in your browser.
- The Grading/Assignment toolbar will appear at the top for defining questions, tests, and point values.
Step 3: Build Assignment Content
Option A: Create a New Notebook
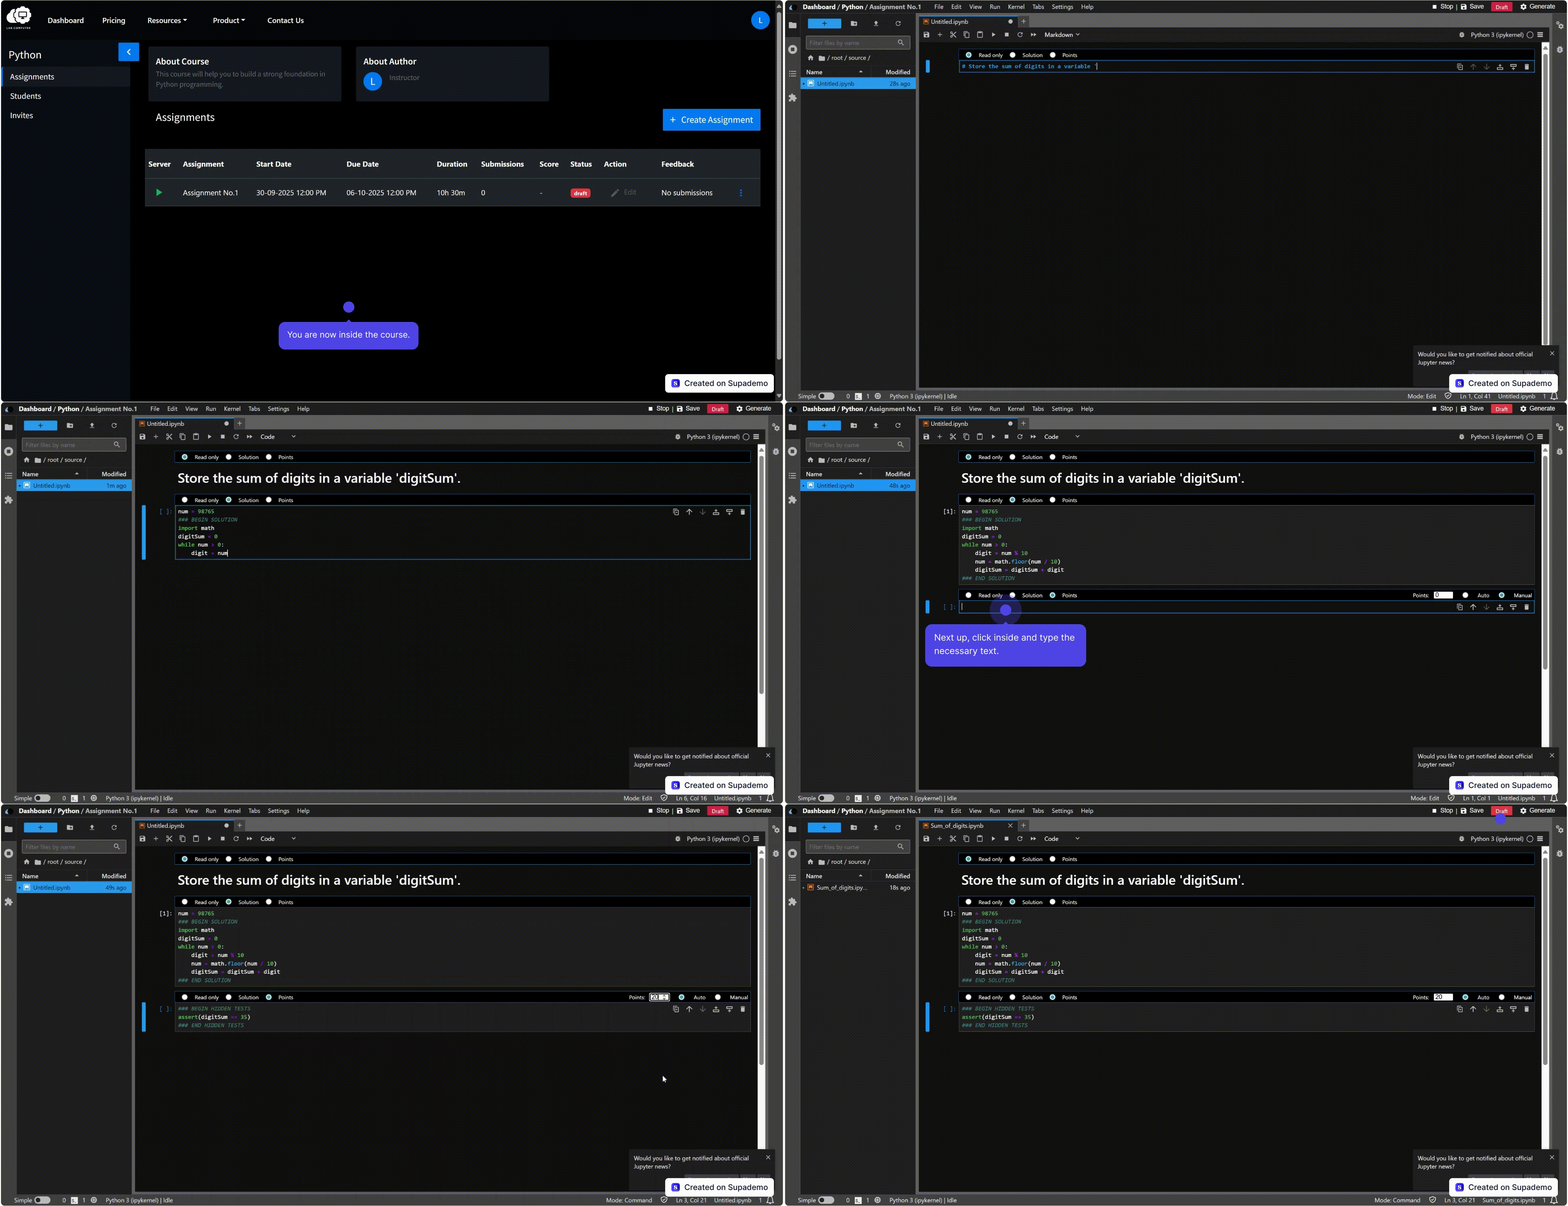
- Click "New Notebook" (or File → New Notebook).
- Choose a kernel.
- Add assignment content:
- Instructions in markdown cells
- Starter code for students
- Questions (auto‑graded or manually graded)
Option B: Upload an Existing Notebook
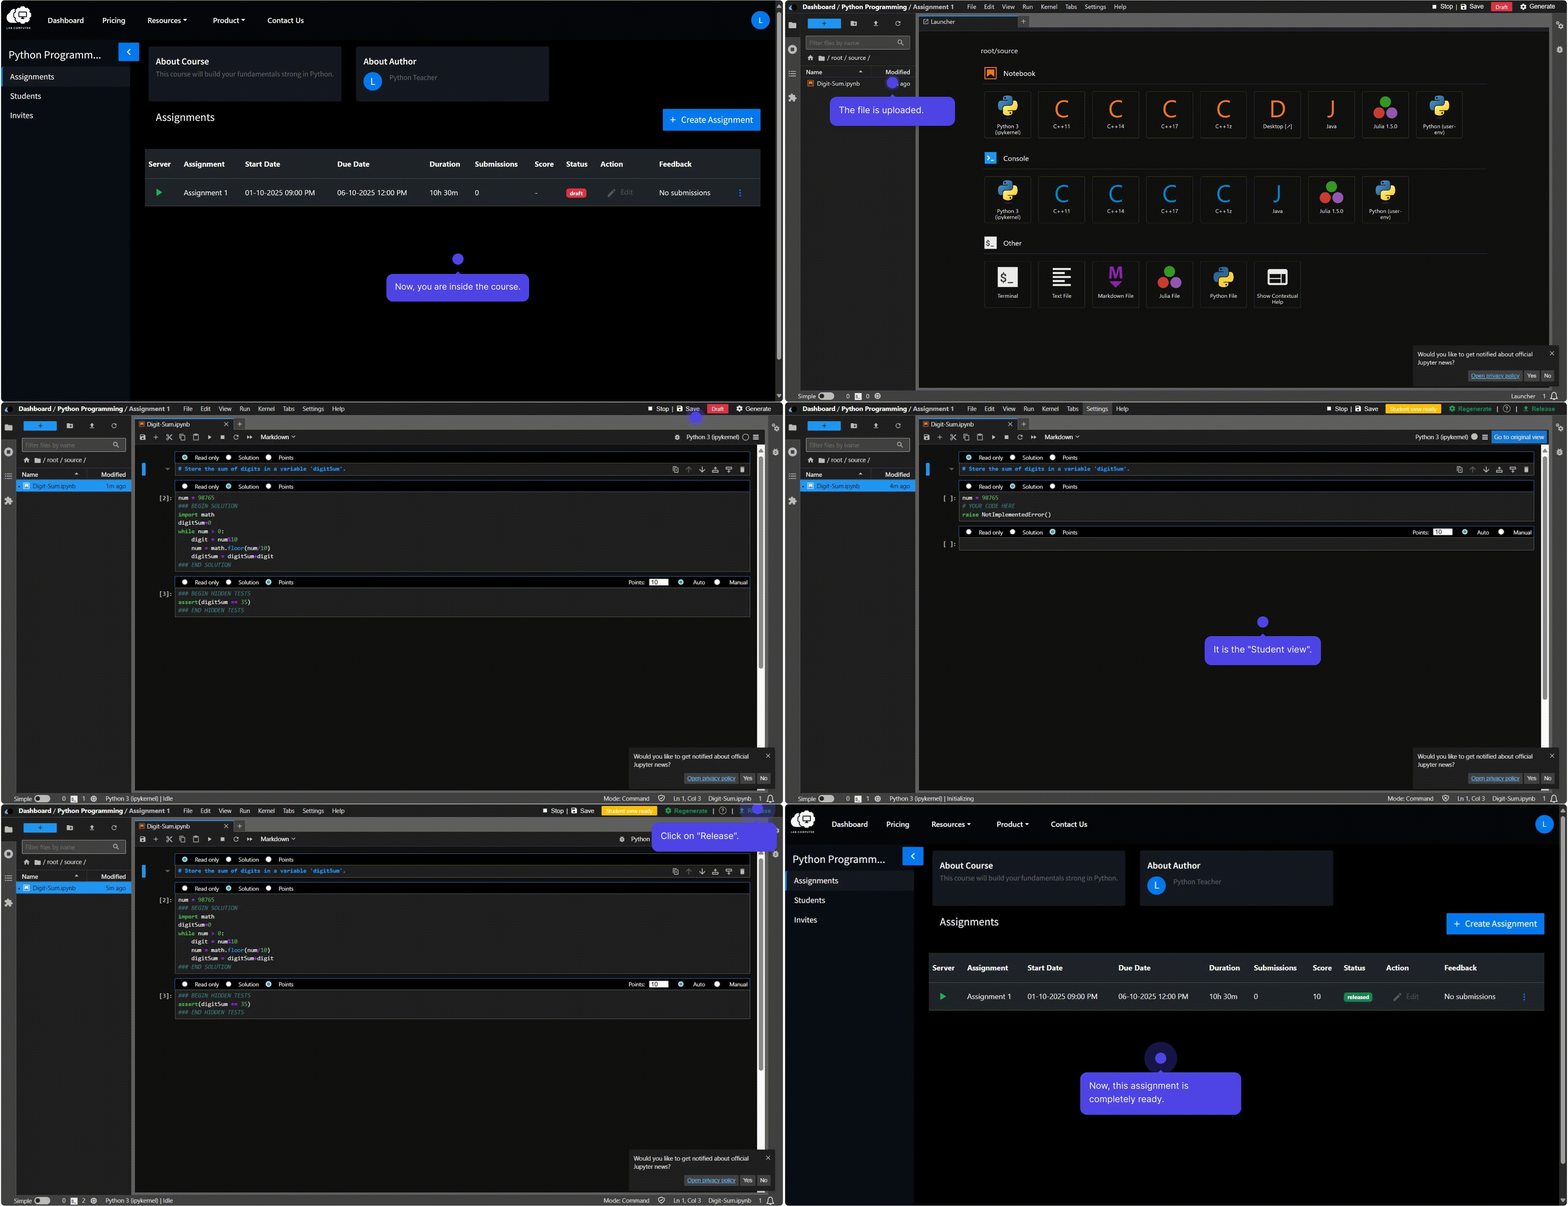
- Click "Upload" (upper‑left corner).
- Select your .ipynb file and open it to continue editing.
- Add tests or grading configurations as needed.
Tips & Best Practices
- Use clear, concise instructions in read‑only markdown cells.
- Choose kernels and dependencies before adding content; verify environment setup.
- Keep tests independent to prevent cascading failures (use visible and hidden tests).
- Save frequently; you can regenerate the student version as you refine content.