Assignment Guide
Assignments are the primary mechanism for student evaluation in Lab.Computer.
Each assignment can include one or more notebooks that combine autograded and manually graded components.
When you create an assignment, Lab.Computer provisions a virtual server (Ubuntu-based) where you can add notebooks and install dependencies. Users have root access to these environments.
Adding Assignments
Instructors can add assignments to a course in three ways:
- Create a new assignment from scratch.
- Clone an assignment from another course.
- Duplicate an existing assignment within the same course.
Creating a New Assignment
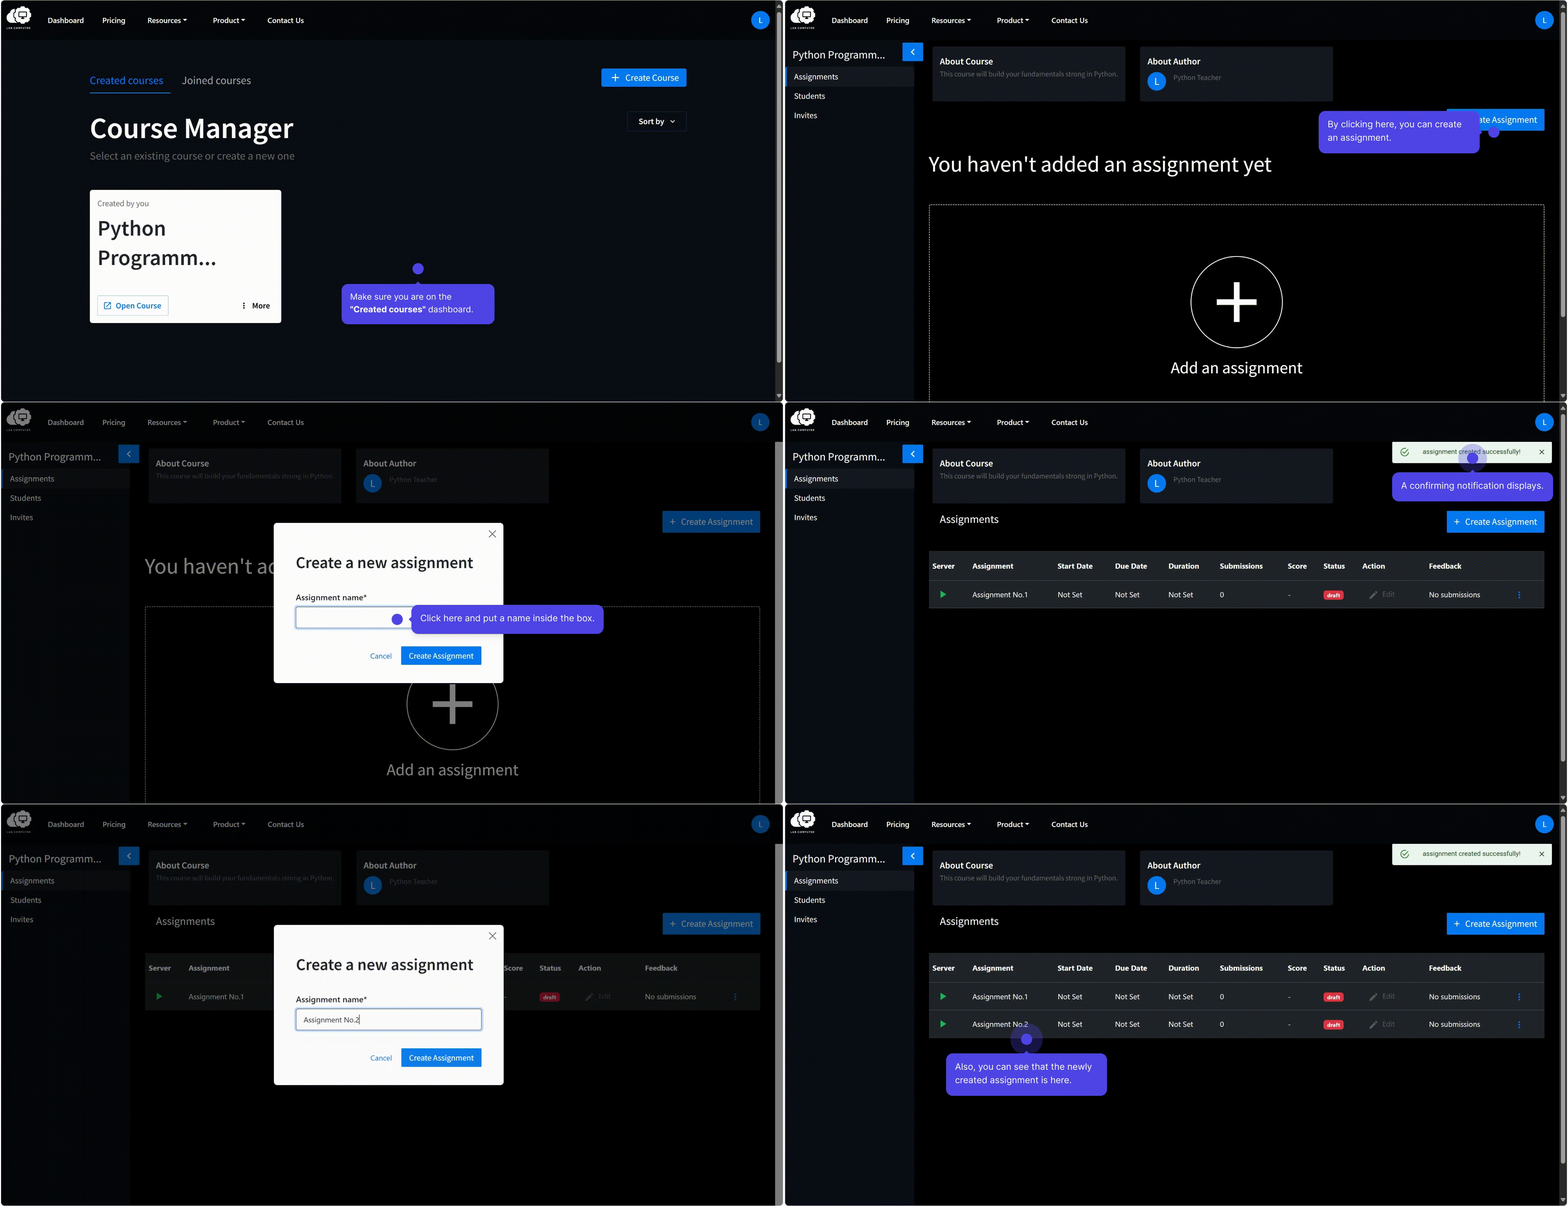
To create a new assignment:
- Open the desired course from your Dashboard.
- Navigate to the Assignments tab.
- Click + Create Assignment.
- Enter a descriptive Assignment Name.
- Click Create Assignment to finalize.
Cloning Assignments (Copy to Another Course)
Cloning allows instructors to copy assignments or entire course content from one course to another.
Note
- Only released assignments can be cloned.
To clone assignments:
- Navigate to the Students section.
- Locate and click Clone link to open the available assignment list.
- Choose one of the following options:
- Clone All Assignments: Copies all released assignments from the selected course.
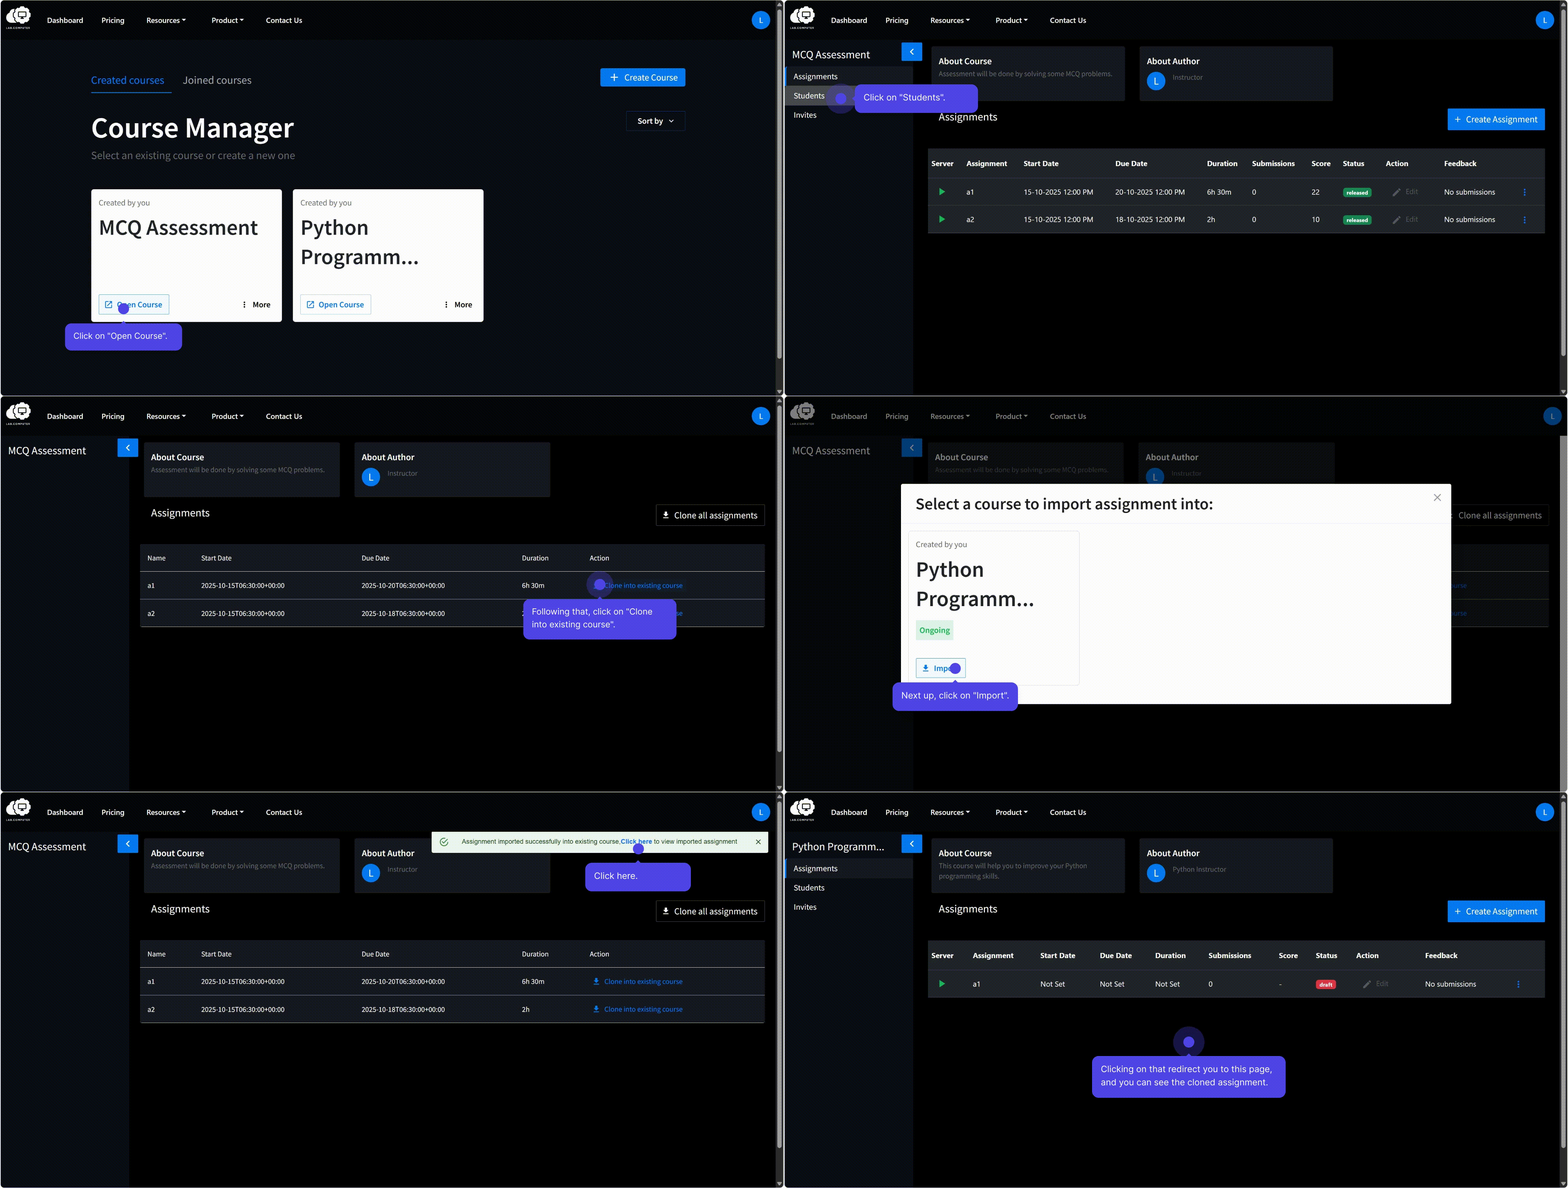
- Clone into Existing Course: Copies a specific released assignment into another course.
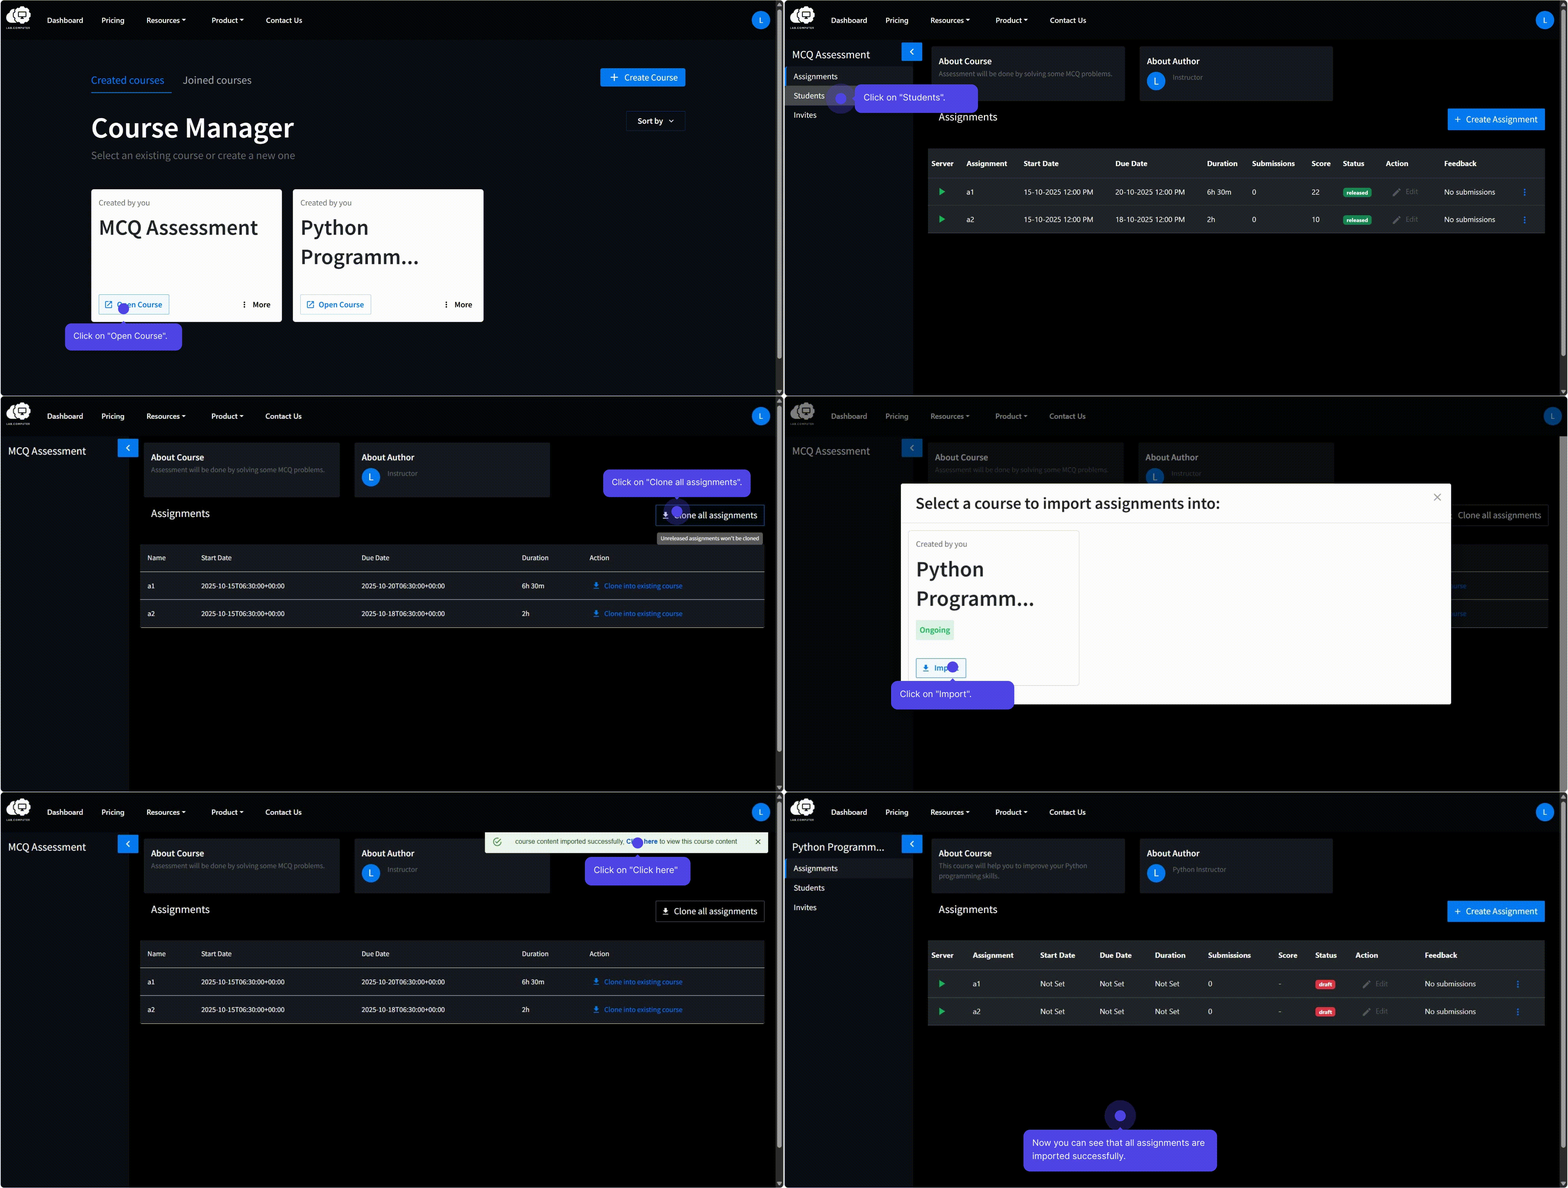
- Clone All Assignments: Copies all released assignments from the selected course.
- Choose the target course and confirm the selection by clicking Import.
Duplicating an Assignment (Within the Same Course)
The Duplicate option lets instructors copy an assignment within the same course — ideal for reusing or modifying content.
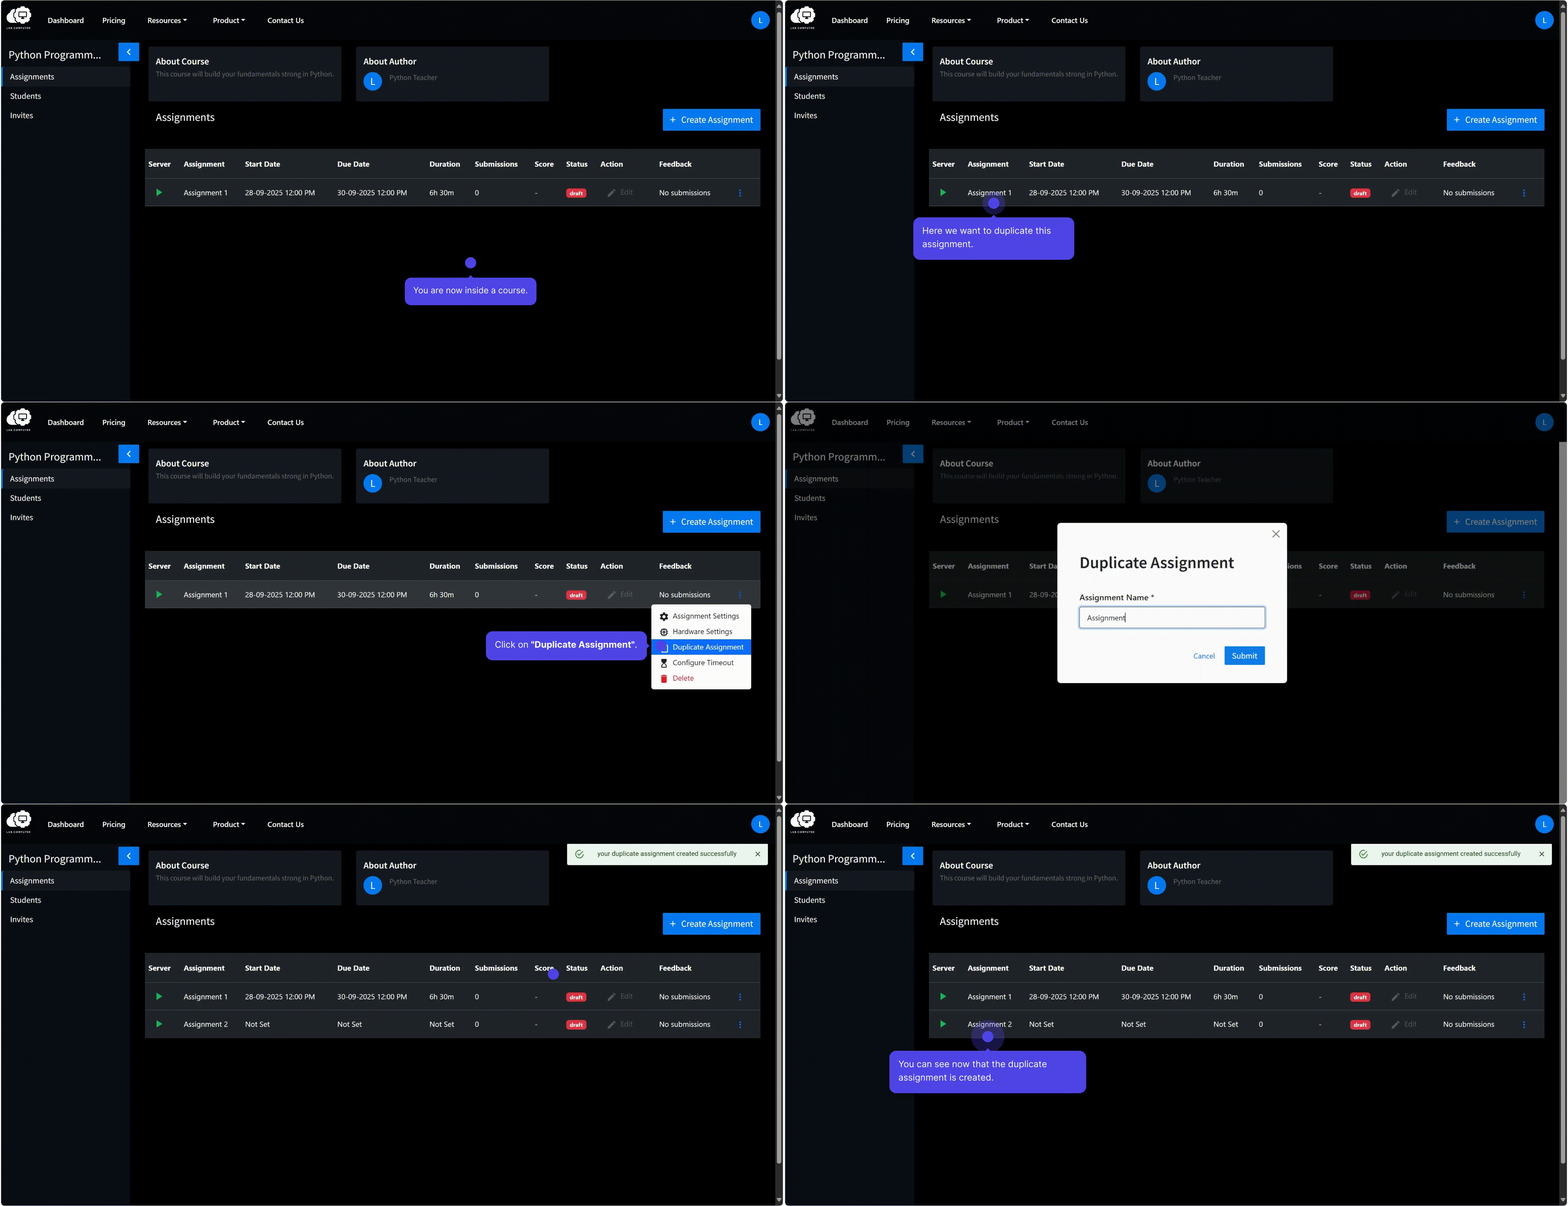
To duplicate an assignment:
- Navigate to Assignments section.
- Locate the assignment you wish to duplicate.
- Click the vertical three dots to open the options menu.
- Select Duplicate Assignment.
- Enter a new name in the popup for the duplicate assignment.
- Click Submit to create.
The duplicated assignment will appear in the Assignments list under the same course.
Configuring Assignments
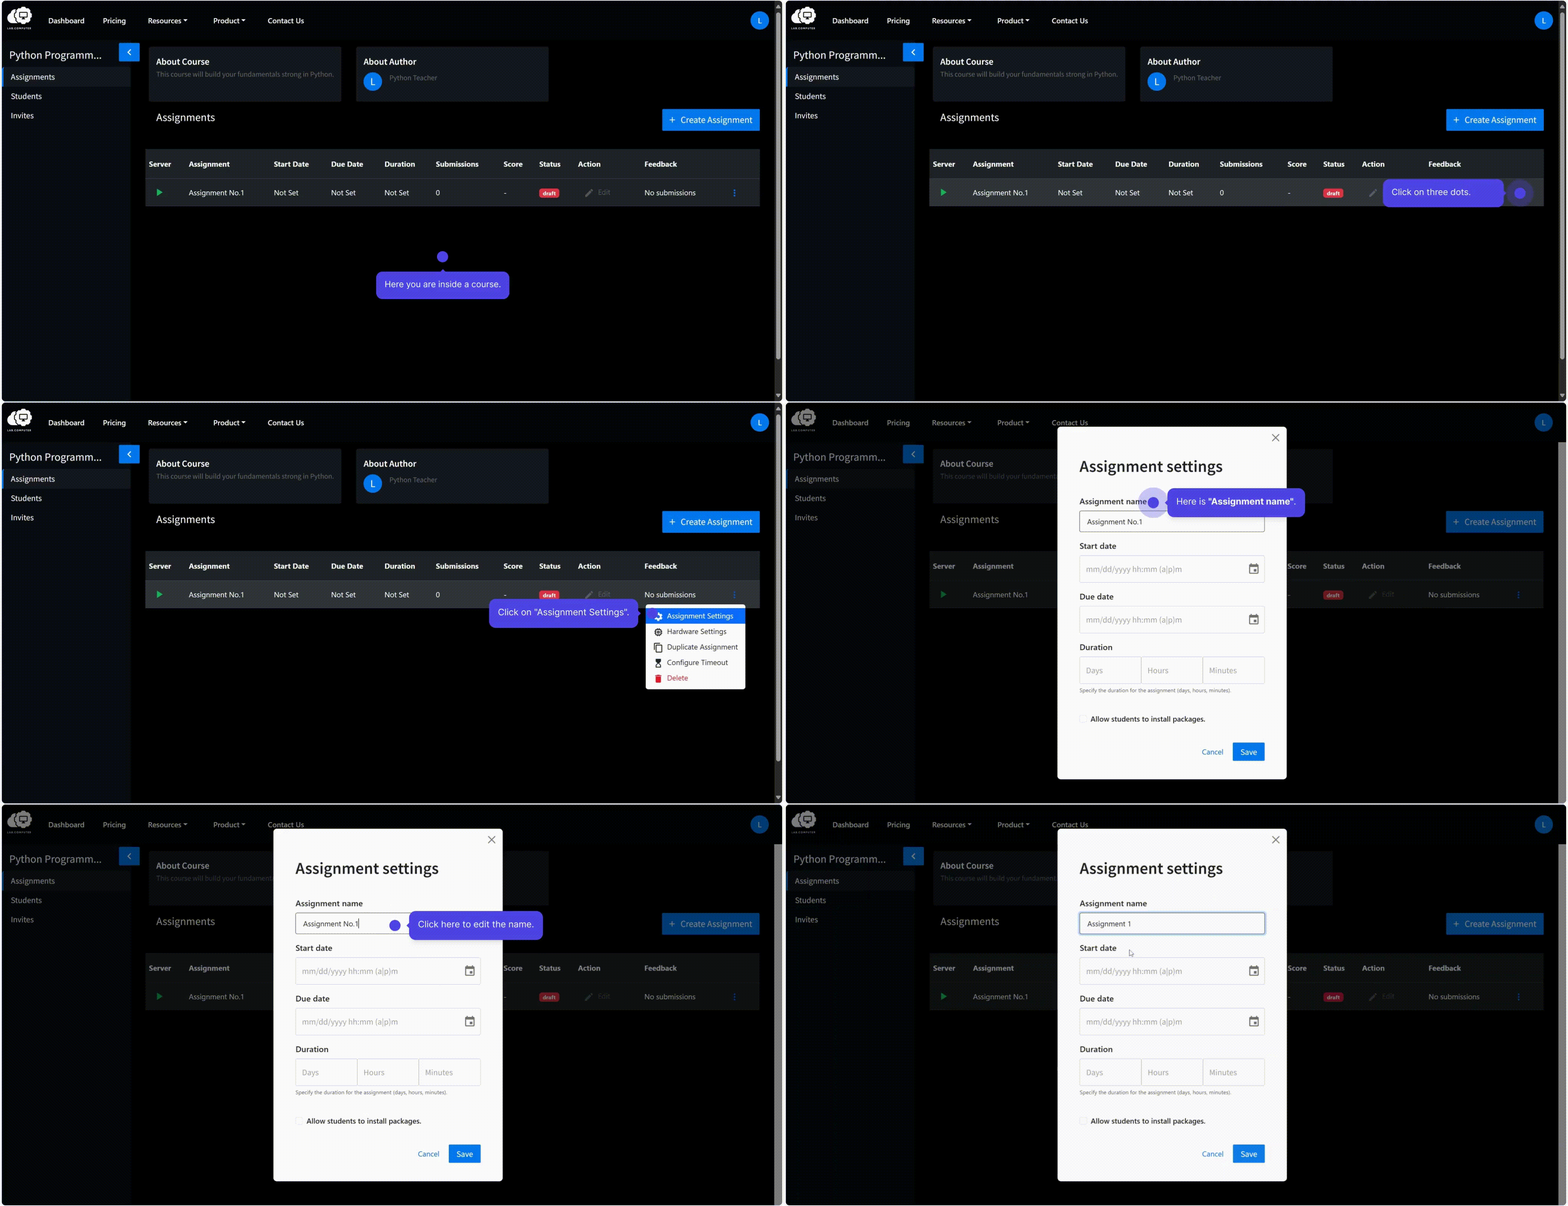
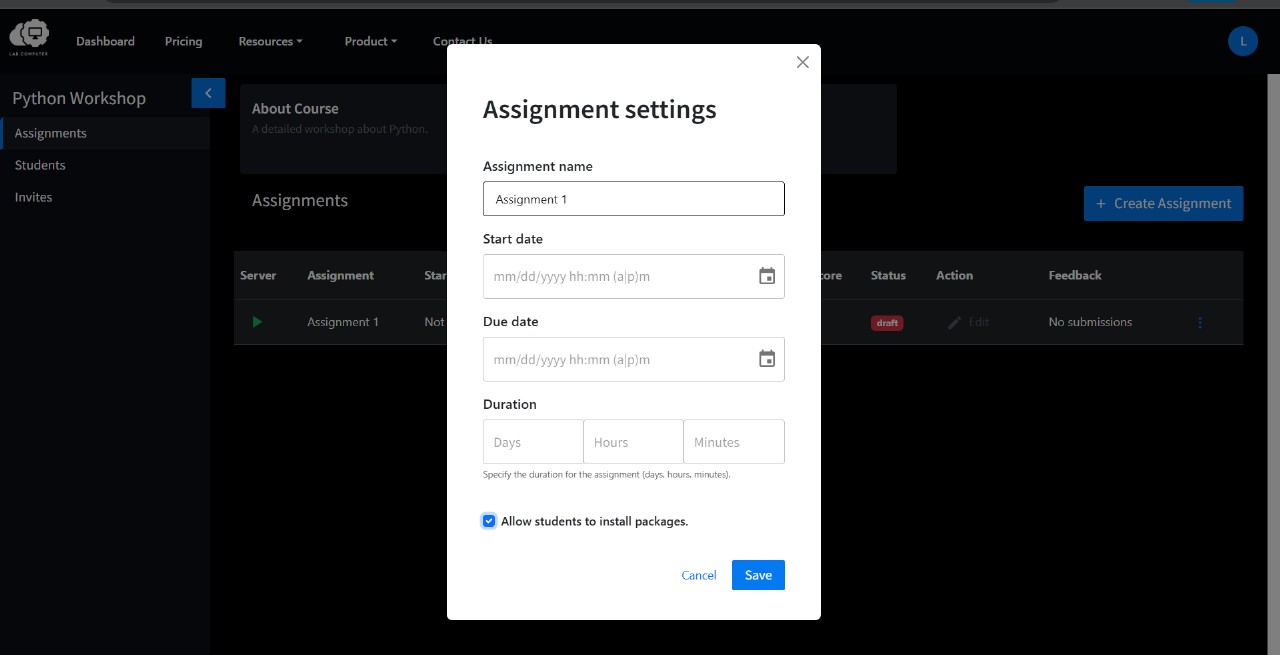
Assignment configuration is accessed through the Action menu (represented by three vertical dots) adjacent to each assignment. Select Edit to access the configuration interface.
Assignment Name
The assignment name appears on student dashboards and in submission records. Using clear, descriptive titles helps students stay organized and aids instructors in record-keeping.
Setting Deadlines and Duration
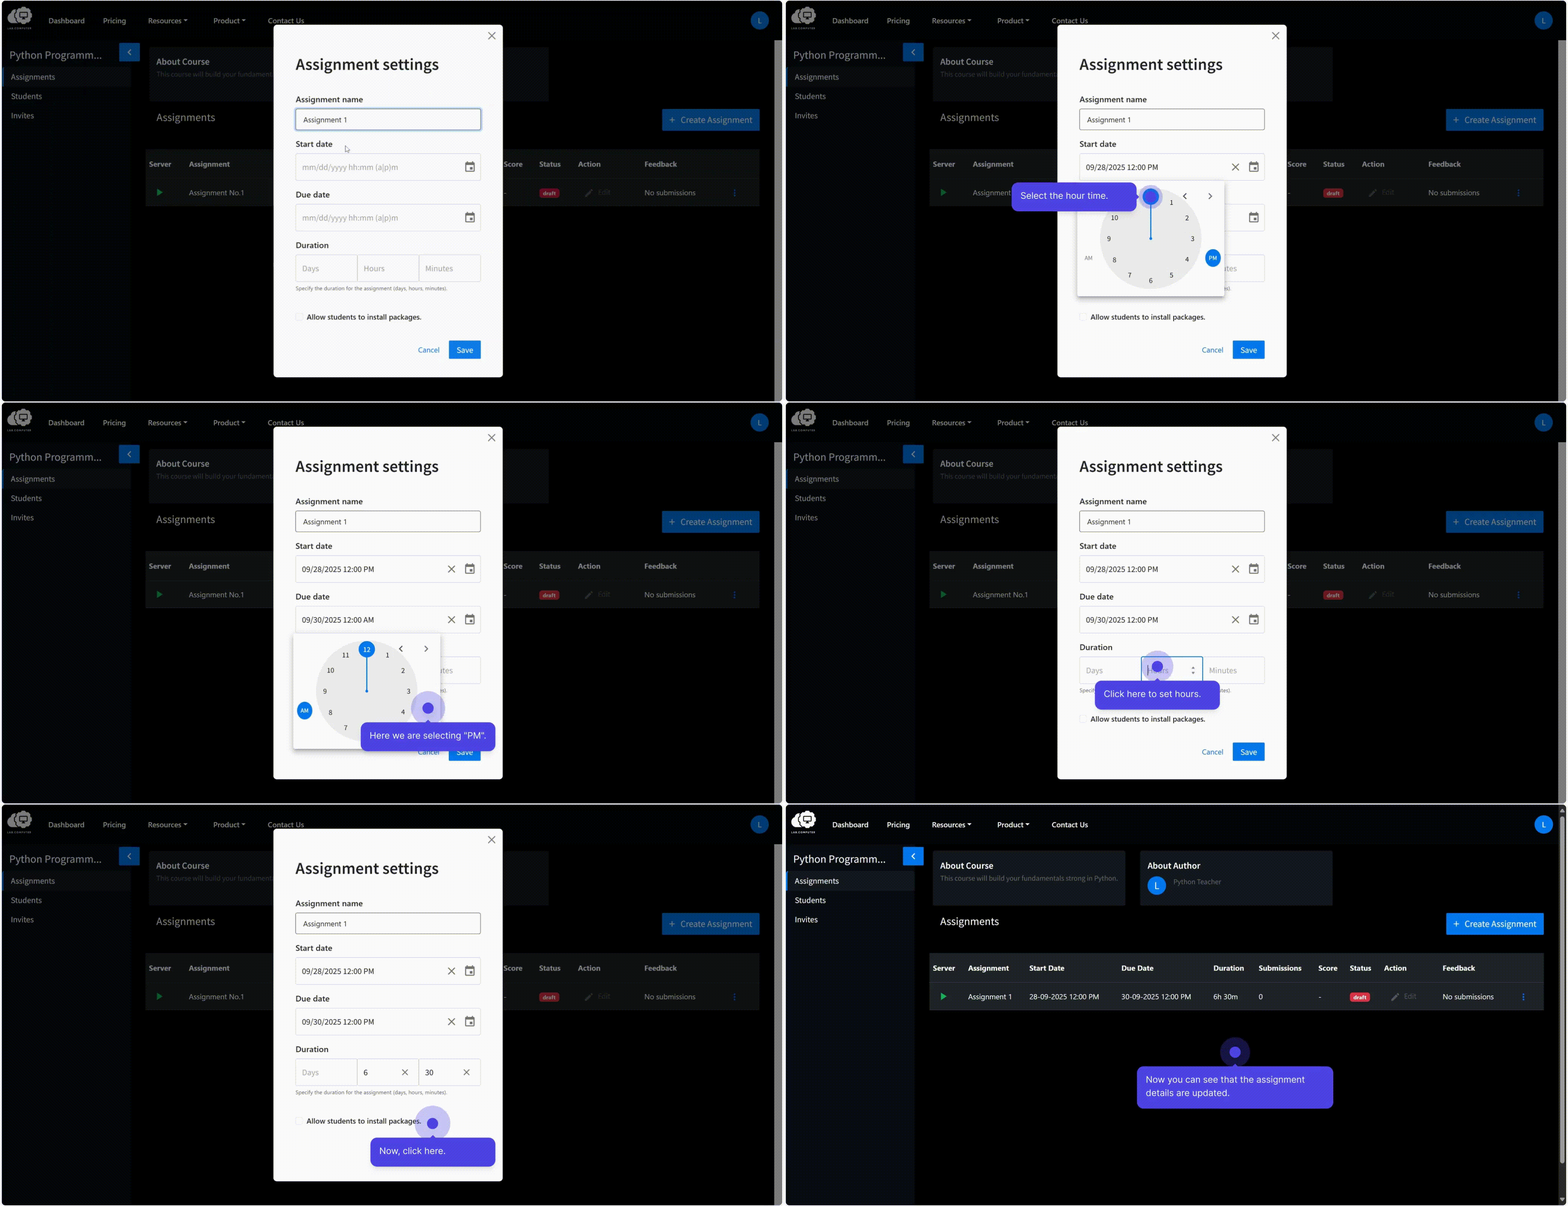
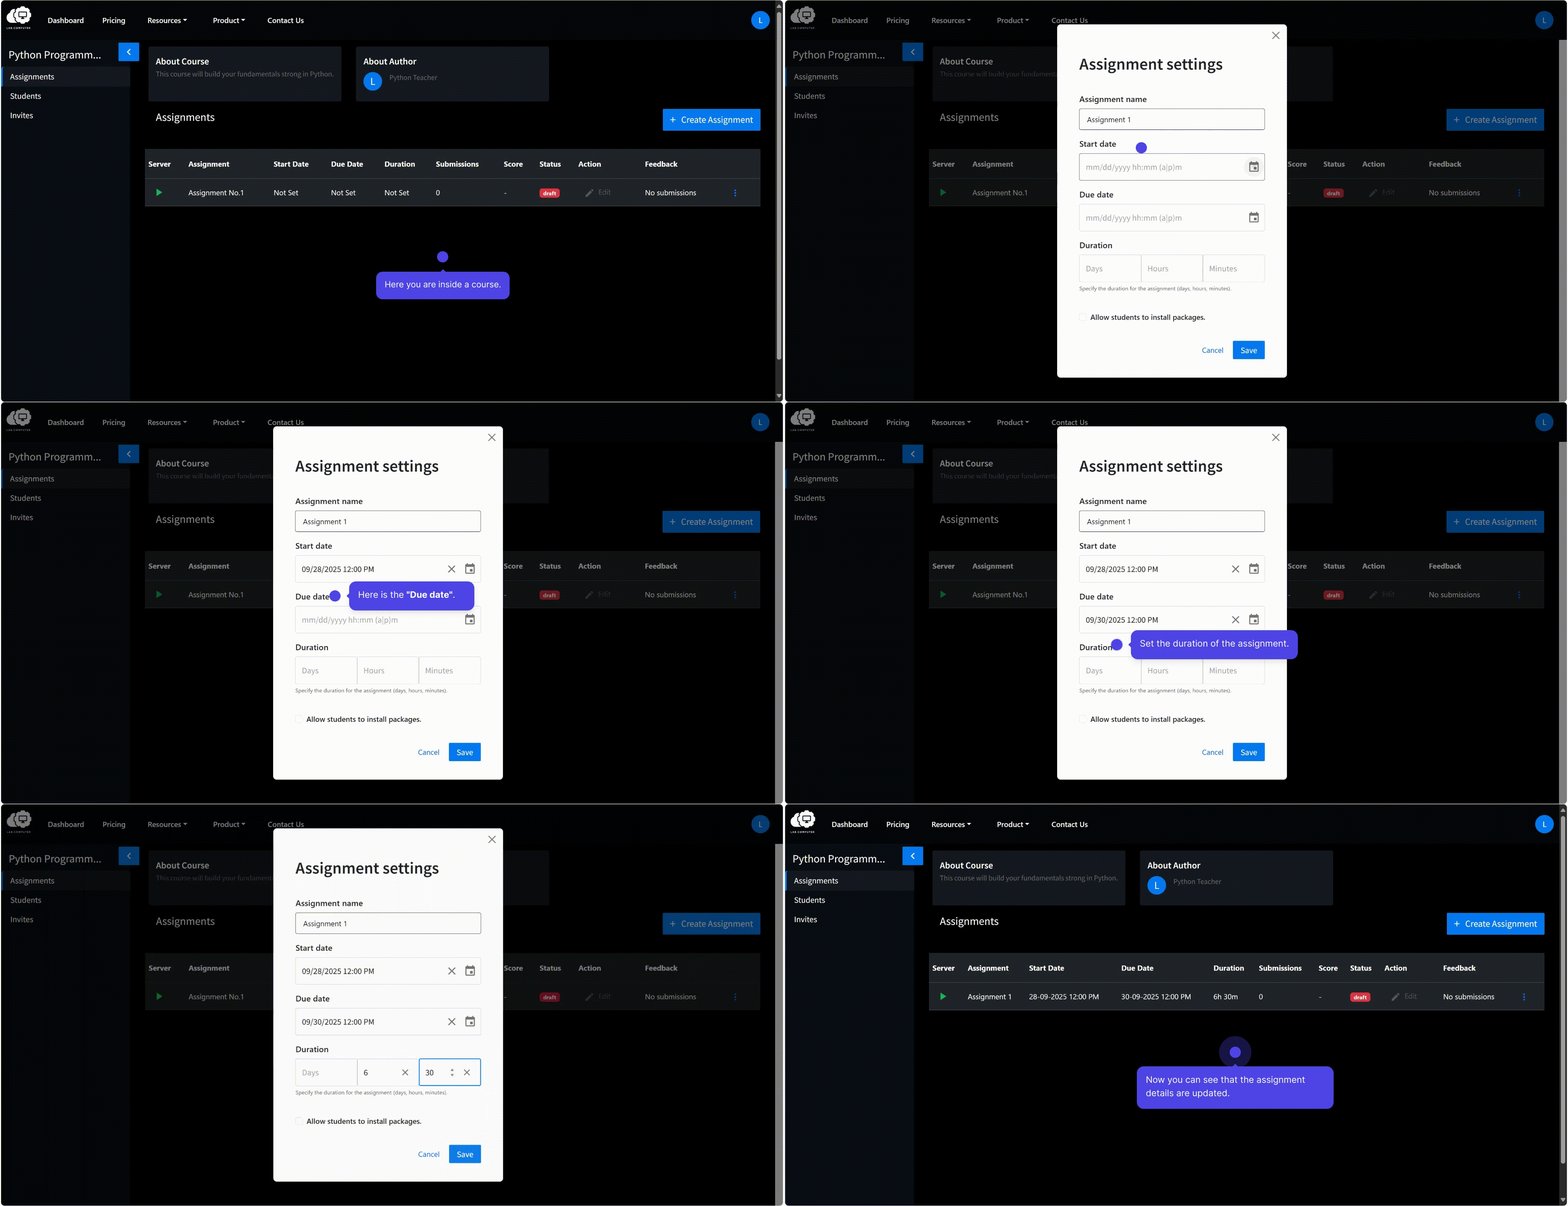
Start Date
Specifies the exact date and time when the assignment becomes accessible to students. Until this timestamp, students cannot launch or view the assignment.
Due Date
Sets the final submission deadline. After this date and time, the system prevents students from submitting additional work. This ensures consistent evaluation timelines and supports efficient grading workflows.
Duration
Defines the maximum time allowed for completing the assignment once a student begins. A countdown timer starts at the moment of assignment launch, and students are expected to complete the work within this duration.
| Setting | Description |
|---|---|
| Start Date | When students can first access the assignment |
| Due Date | Final submission deadline |
| Duration | Maximum time limit after starting the assignment |
Configuring Hardware and Resources
Hardware configuration allows instructors to allocate appropriate computational resources for the assignment. This ensures students have sufficient processing power for their work while maintaining system efficiency and equitable access for all participants.
Resource Type:
The resource type determines the computational power allocated to each student's assignment environment. Available configurations include:
| Resource Type | Specifications | Typical Use Case |
|---|---|---|
| 2vCPU-2GB | 2 cores, 2 GB RAM | Basic coding tasks |
| 2vCPU-16GB | 2 cores, 16 GB RAM | Data analysis or memory-intensive work |
| 4vCPU-15GB-T4GPU | 4 cores, 15 GB RAM, T4 GPU | Deep learning or GPU-accelerated workloads |
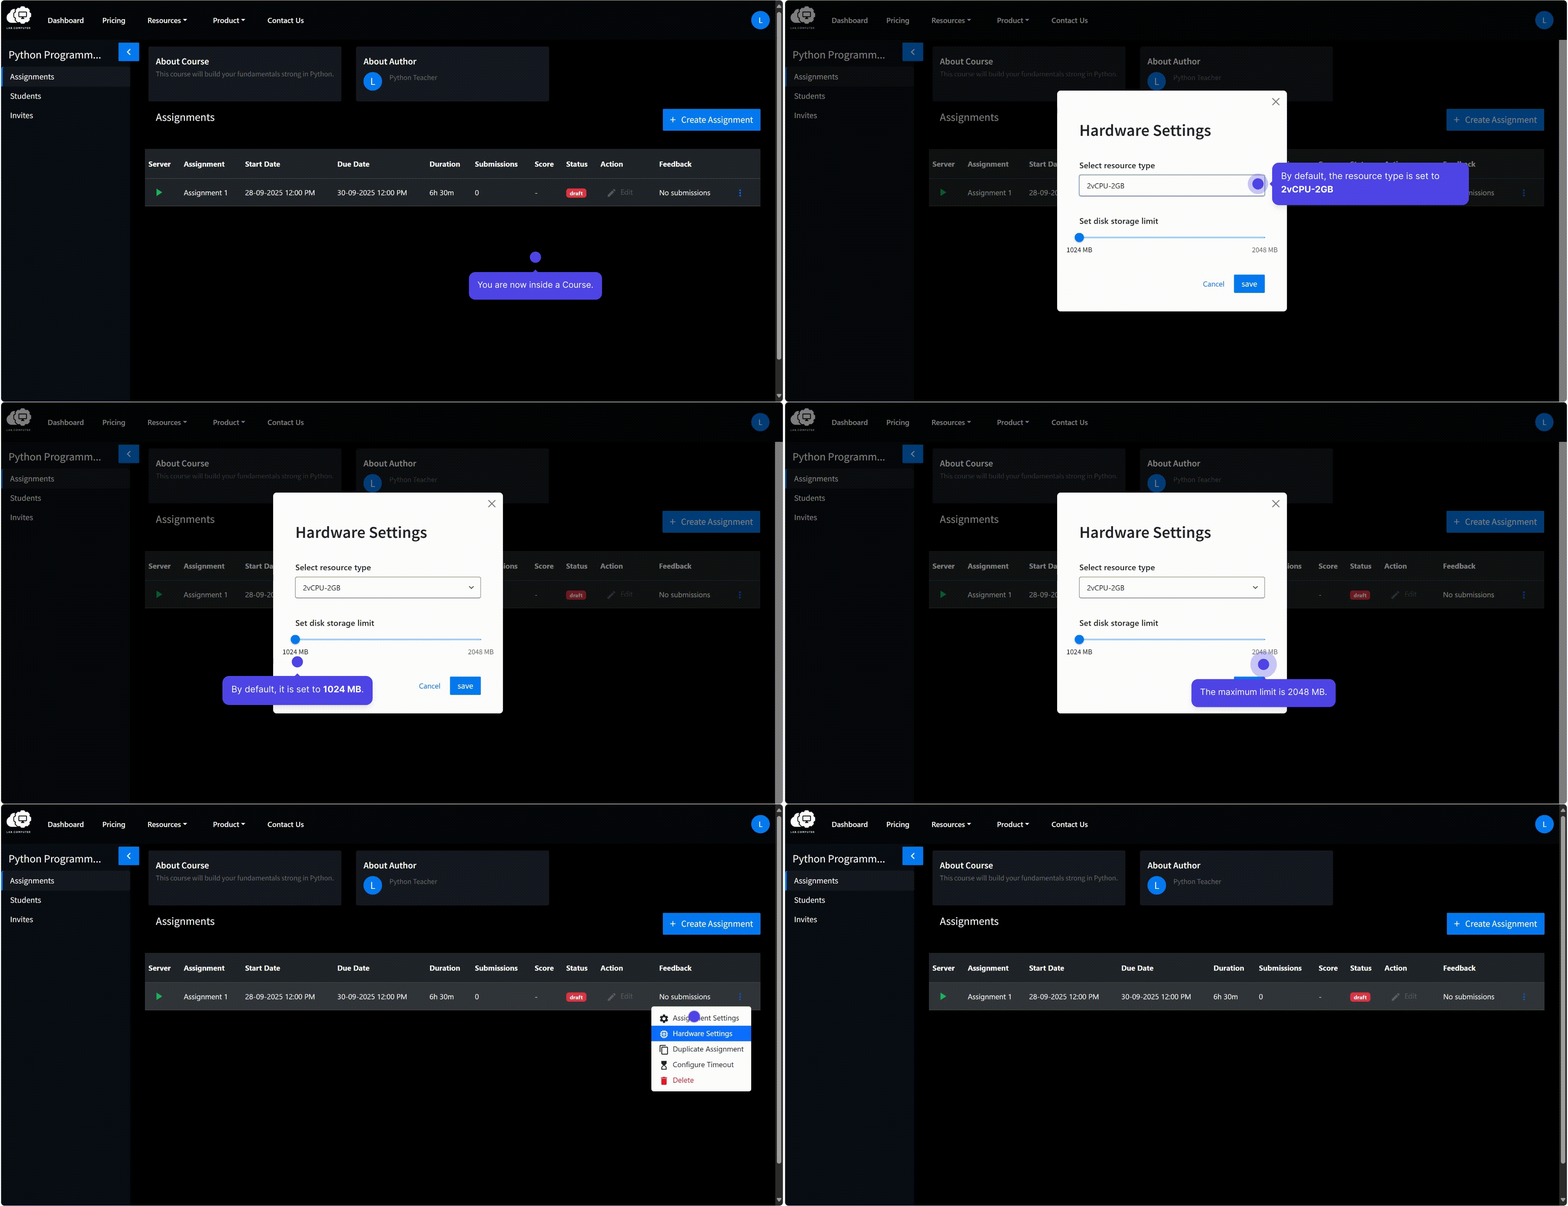
Disk Storage Limit
The disk storage limit defines the maximum storage capacity available for packages, generated files, and datasets within each student's isolated environment. The acceptable range spans from 1024 MB to 2048 MB, depending on assignment requirements.
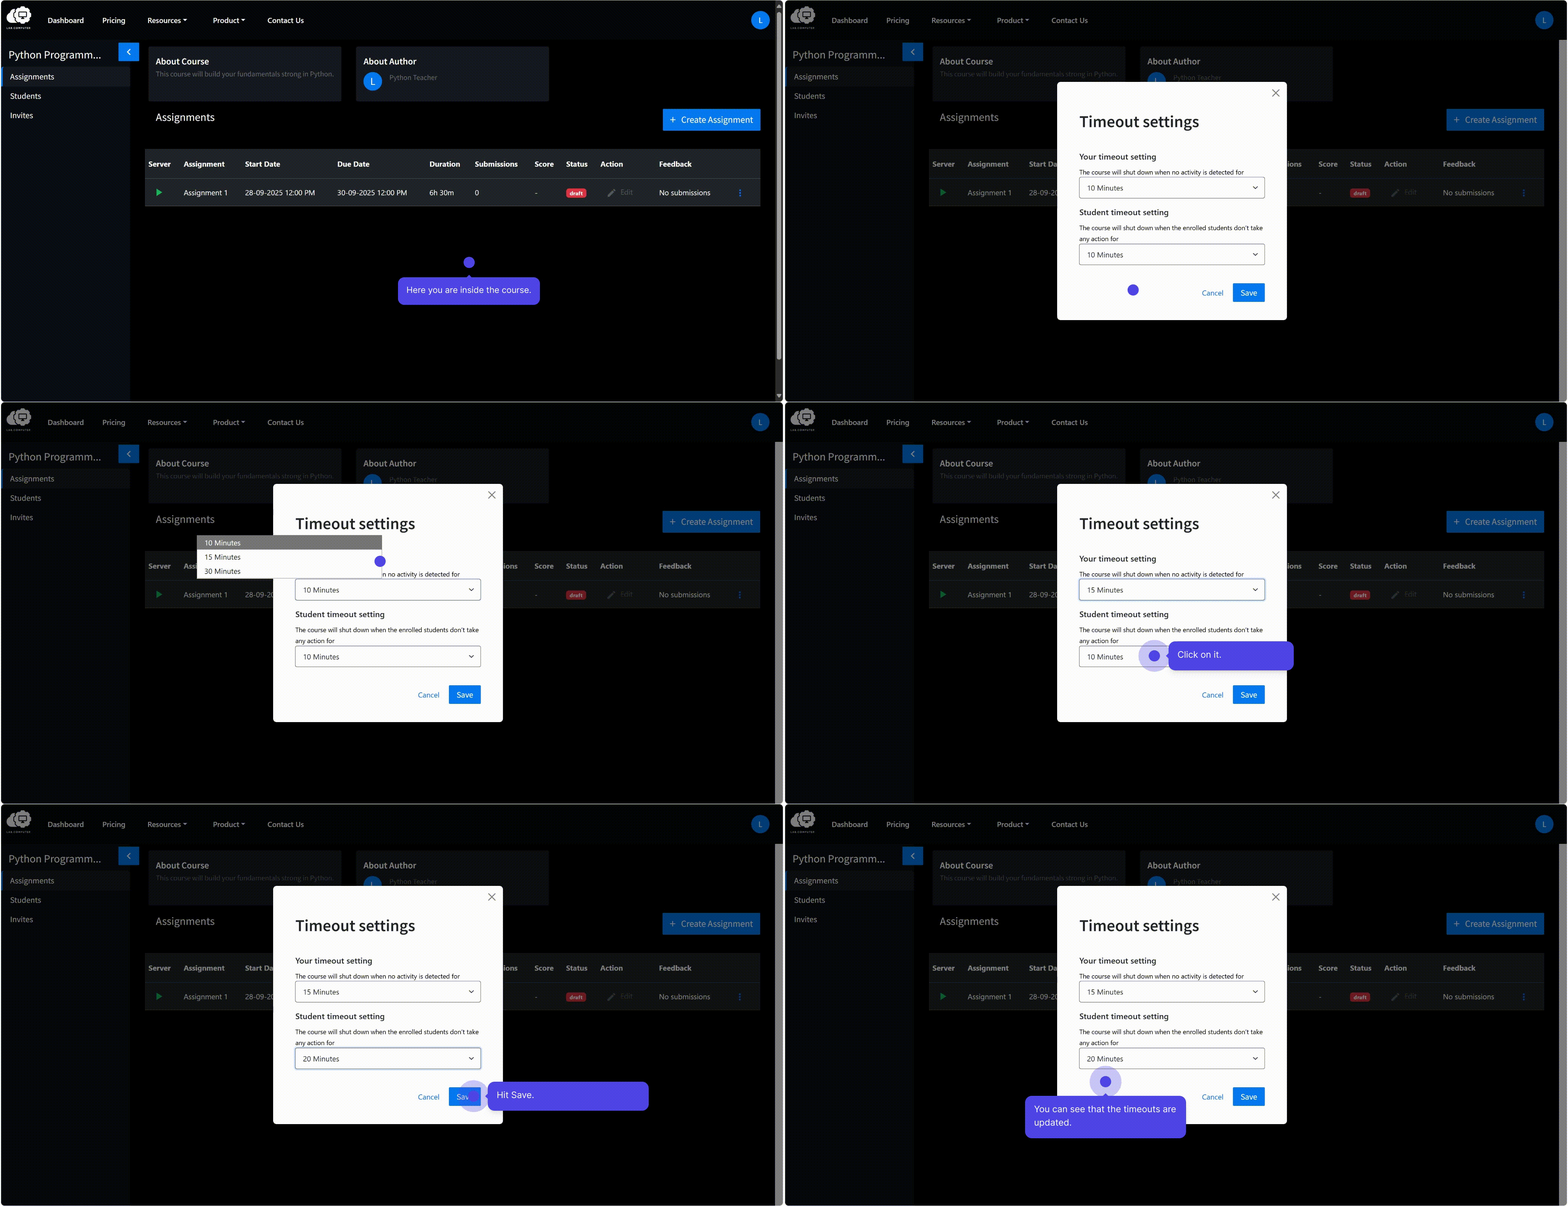
Timeout Settings
Timeout configurations manage server resource allocation and automatic session termination following periods of inactivity.
Instructor Timeout
Instructor timeout may be configured to 10, 20, or 30 minutes. This parameter defines the inactivity period following which the instructor's notebook server automatically closes. The default setting is 10 minutes.
Student Timeout
Student timeout is established by the instructor with a default setting of 10 minutes, adjustable to a maximum of 20 minutes. This parameter dictates the inactivity period before automatic server closure for student environments.
Installing Assignment-Level Software
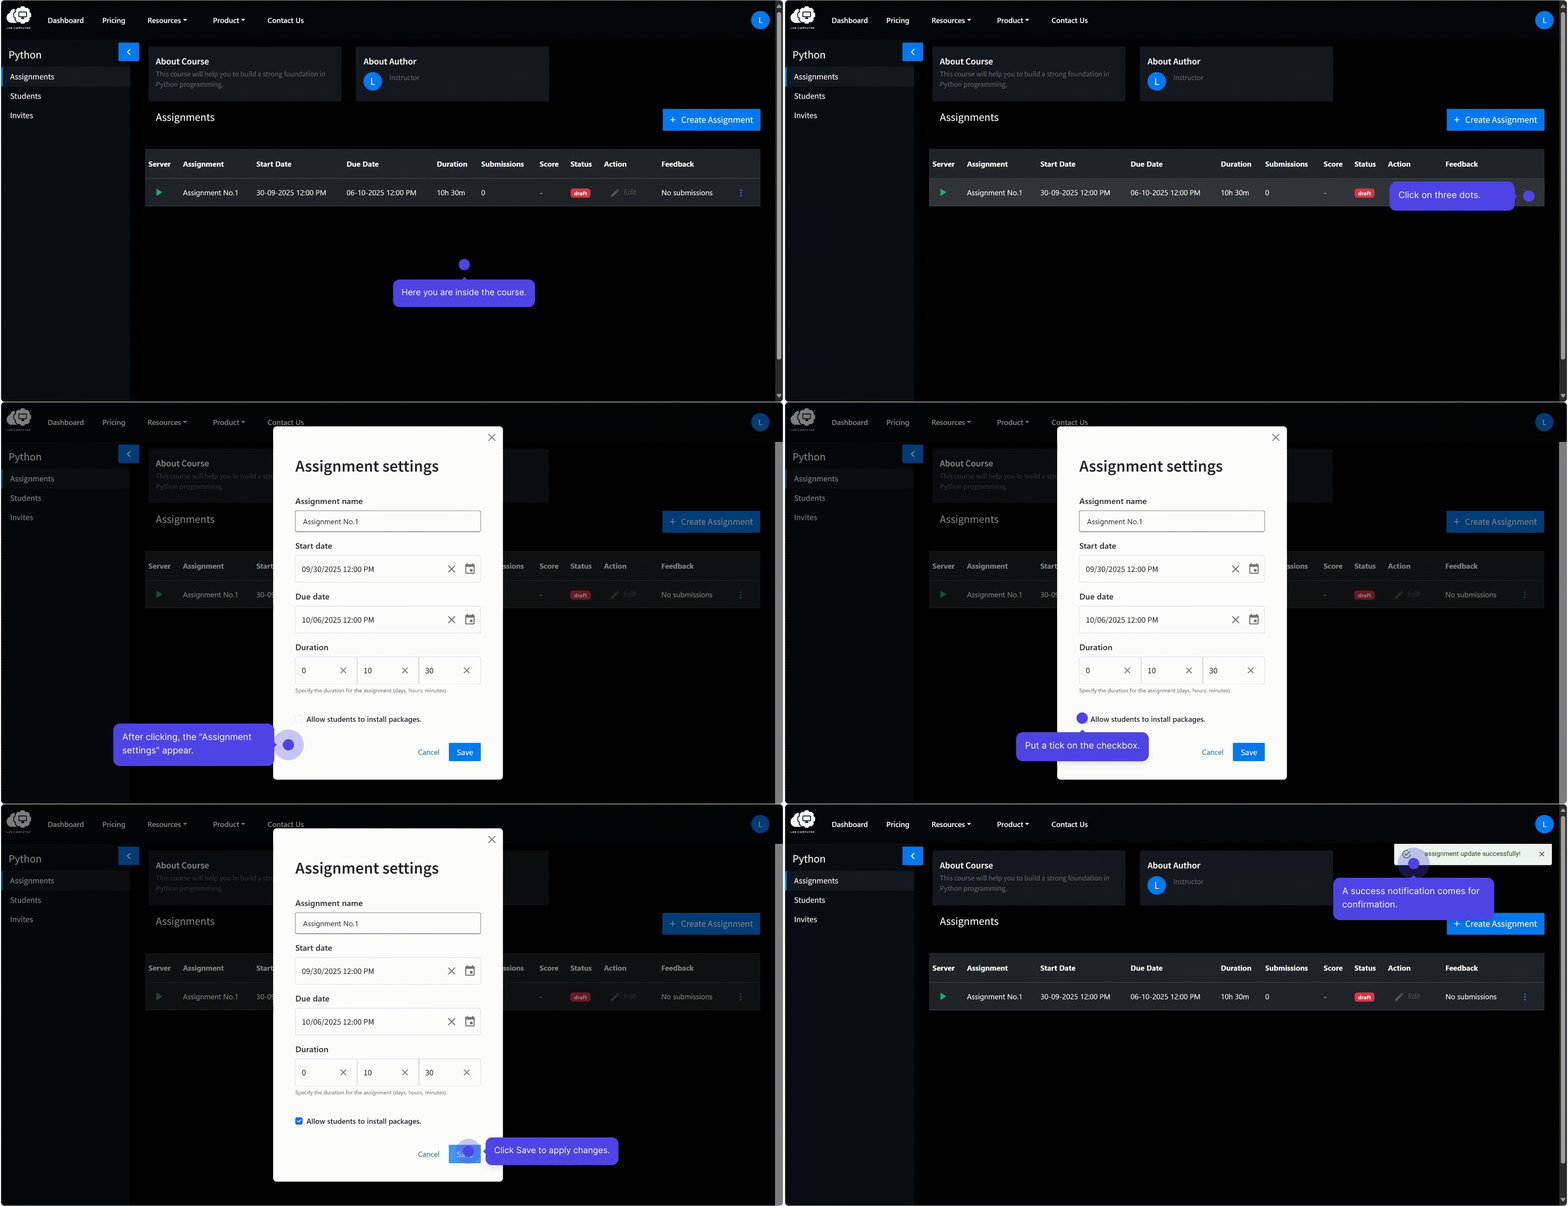
The Allow Package Installation setting controls student permissions for executing package installation commands (pip install, conda install, apt install) within the assignment terminal environment.
Enable this for:
- Assignments requiring external libraries
Disable this for:
- Strict coding exercises where dependencies are fixed
Deleting an Assignment
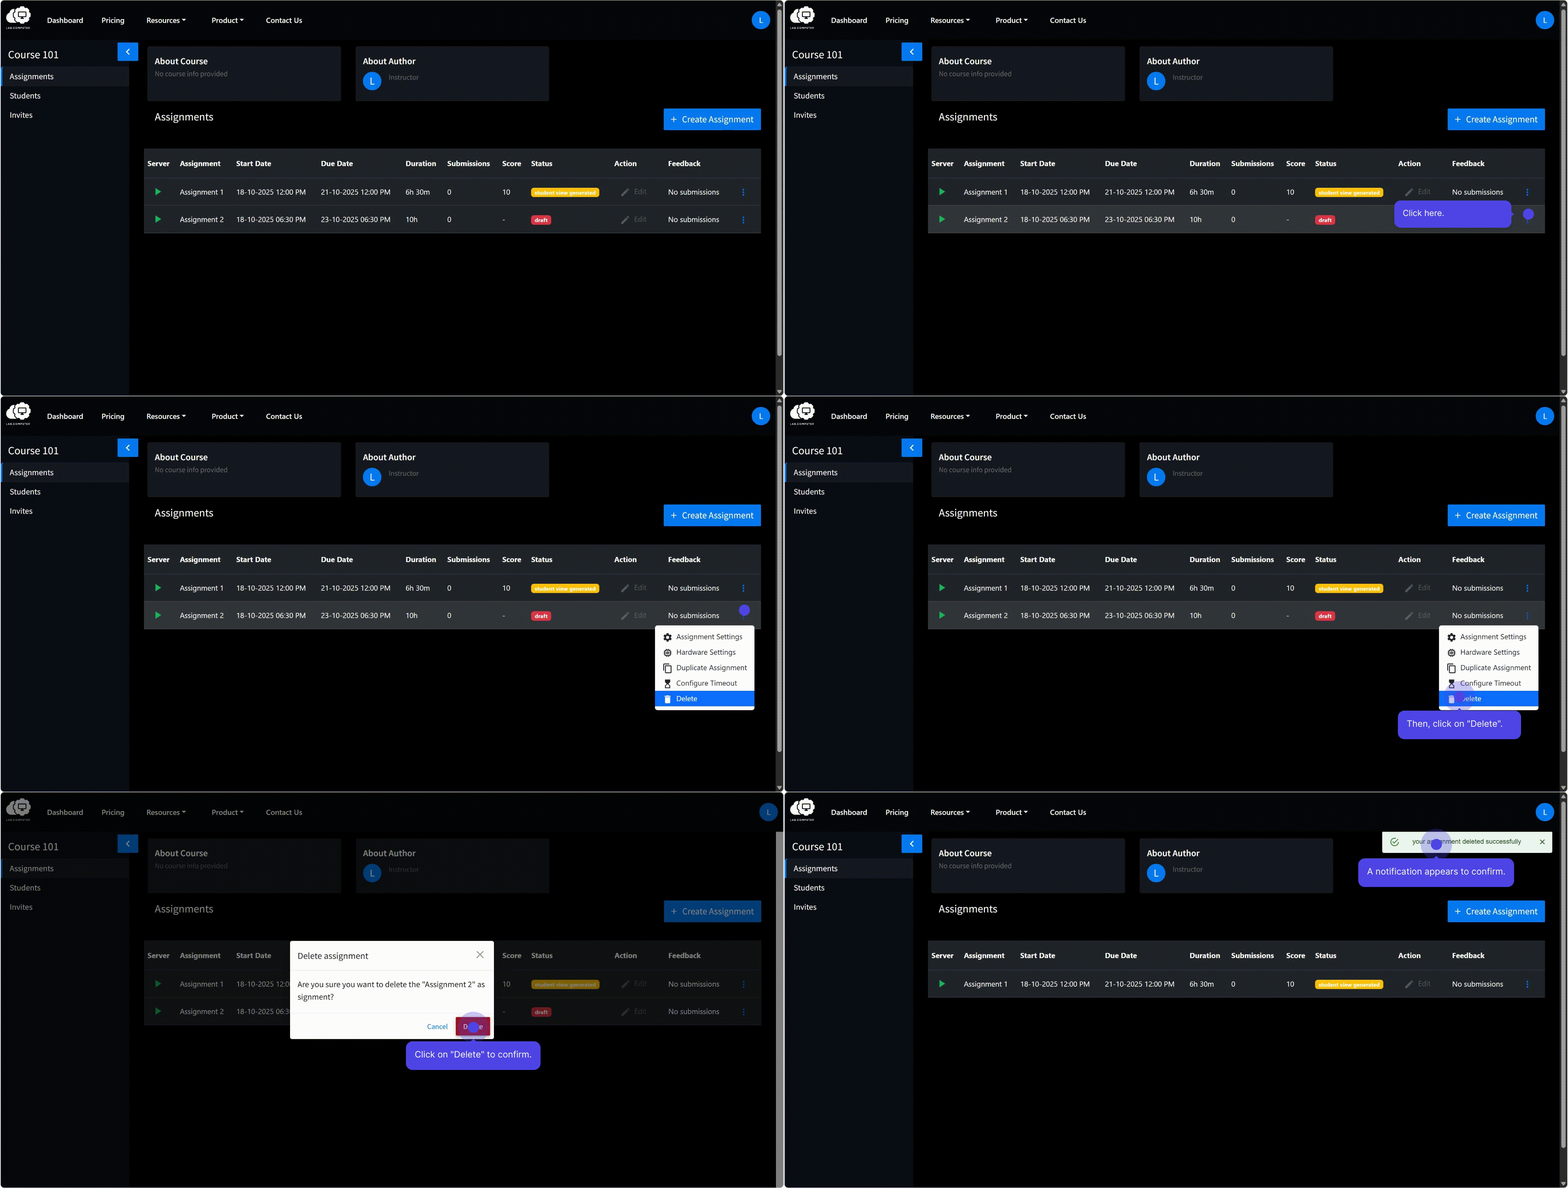
- Go to the Assignments section.
- Click the three dots (⋯) next to the target assignment.
- Select Delete → confirm deletion.
Adding Notebooks as Assignment Content
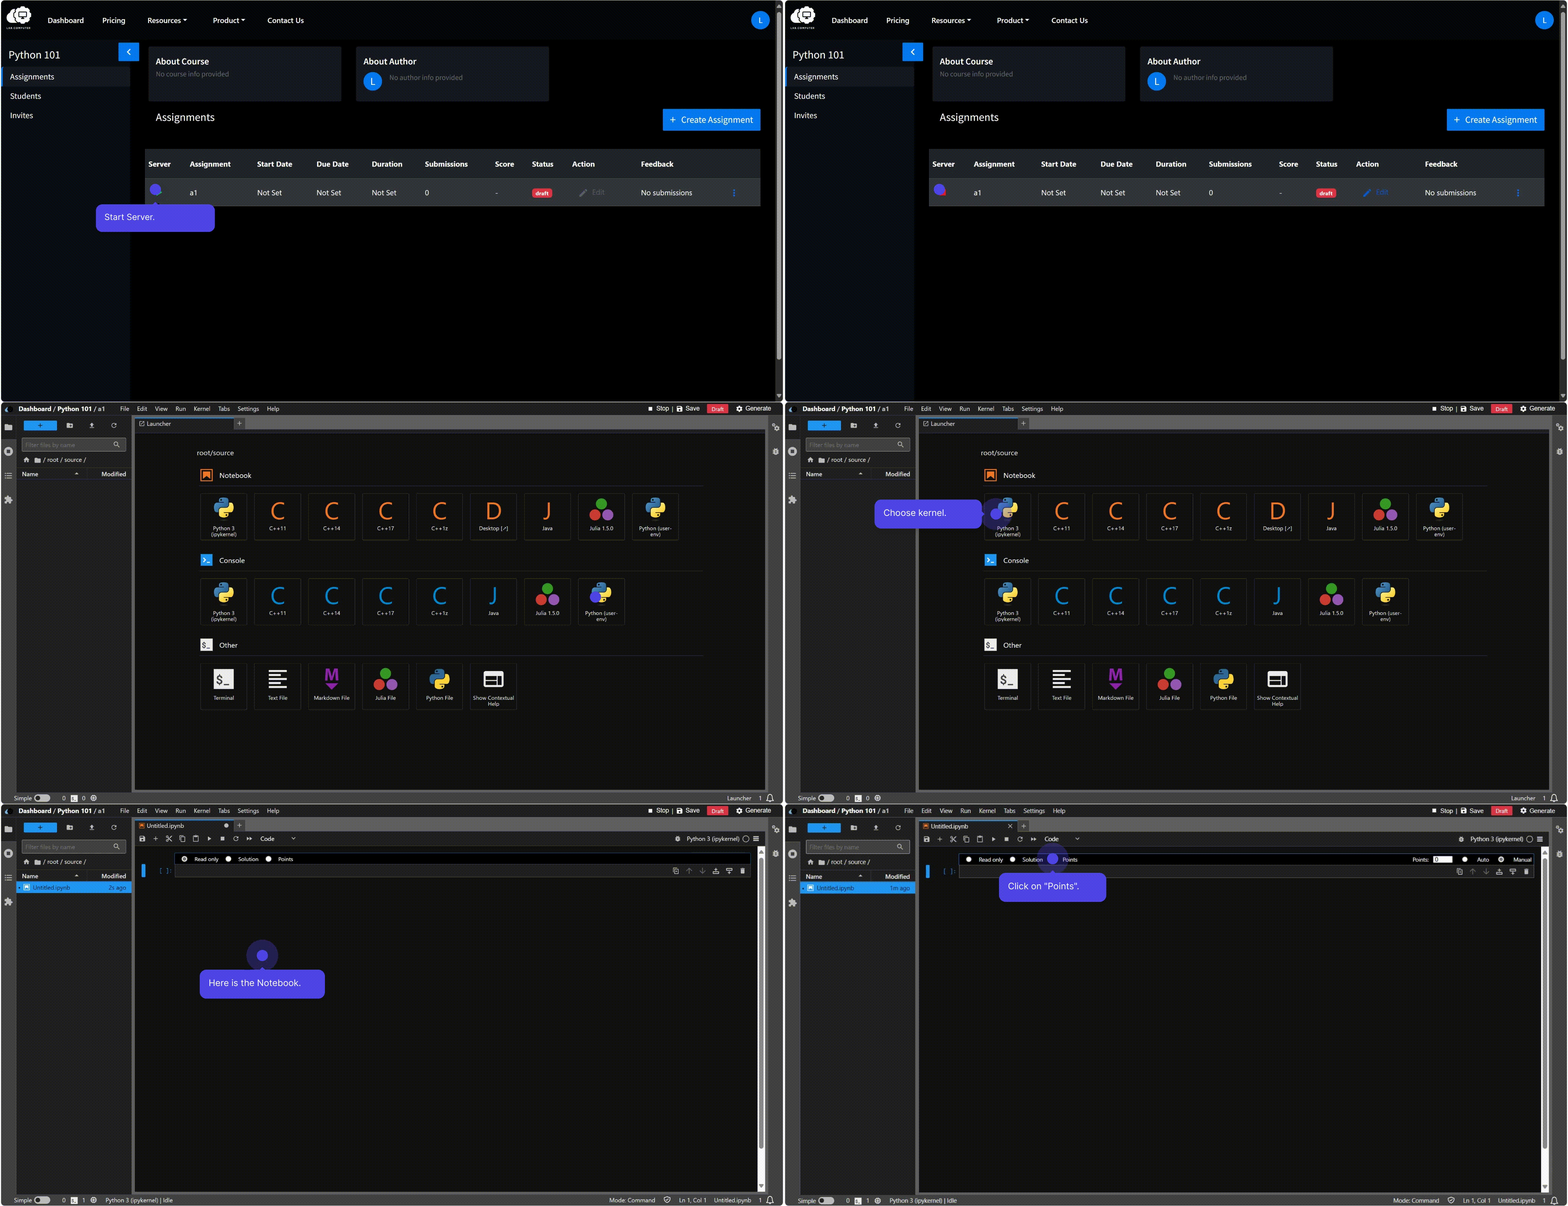
After creating an assignment, you must initialize its server:
- Locate the assignment in the Assignments section.
- Click Server / Launch to initialize the computational environment.
- Once started, click Edit to open the notebook editor.
You can now:
- Add instructions and problem statements
- Insert student response cells
- Define test cells and point values
Releasing an Assignment
Once ready to publish:
- Click Generate in the notebook editor (top-right).
- After the assignment is generated, click Release to make it available to students.
Note
- If any changes are made to the assignment notebook after generation, it must be regenerated by clicking the Regenerate button before releasing.
- After release, any edits you make will not be reflected in the student view. Ensure the content is final before releasing.
For a deeper overview of the release workflow, see Generating and Releasing Assignments.